Brief No. 3: Fabrication
Brainstorm
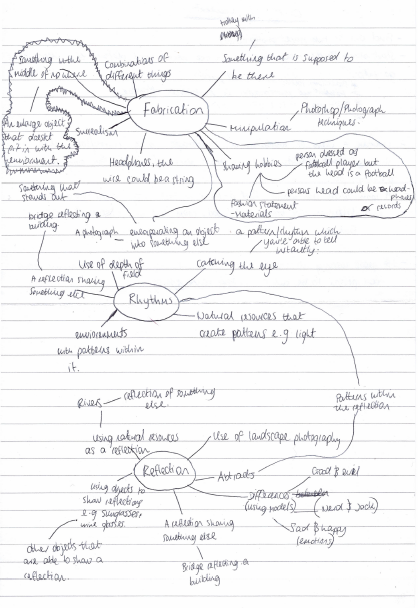
During this brainstorm I noted down three themes that stood out to me the most. These were fabrication. rhythms and reflection. During this thought process I came out with the most ideas for fabrication and reflection. The idea's I chose for fabrication stood out to me the most as I am interested in the 'replacing the head' technique. I am going to fulfill this technique by choosing hobbies. For example, someone would enjoy playing football, so I will make the background have a football feel to it and replace the head with a football.
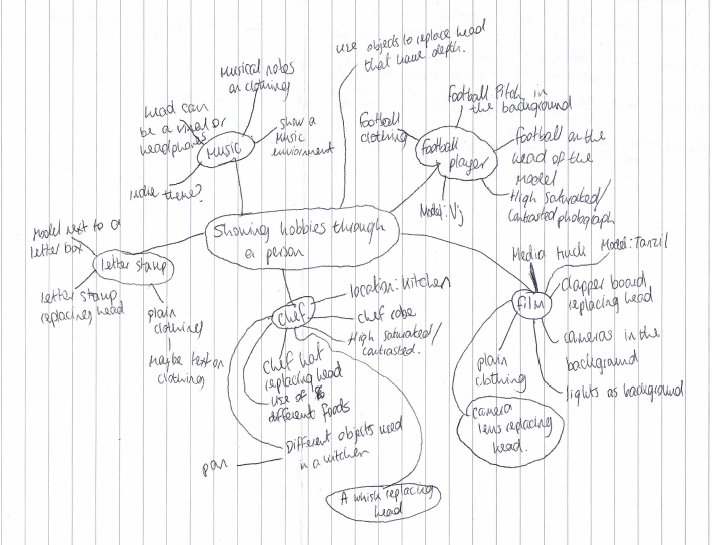
This is another brainstorm I did for my final piece. This brainstorm consisted of ideas for my fabrication theme where I picked out different hobbies which people may enjoy.
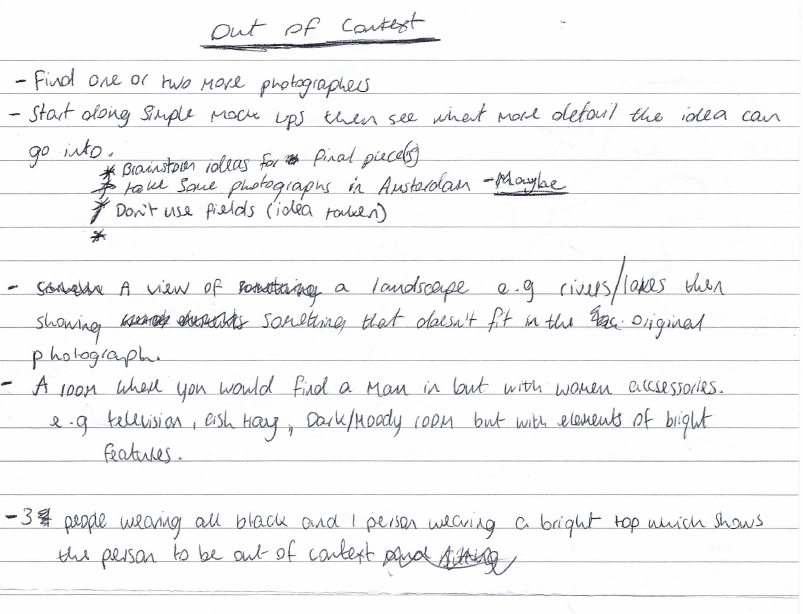
This brainstorm was an outline for what steps I am going to go through for the duration of that 8 weeks that are given. I will also change a few features as the weeks go by to make my idea better and final piece more interesting.
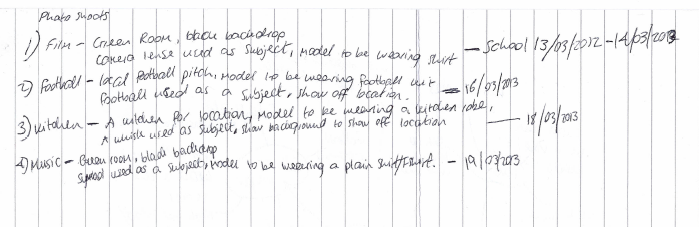
These are the final four hobbies I have chosen to do which would be realistic for me to complete in the time given. I have also planned out when I am going to do these photo shoots and what I will need when I do the photo shoots.
Sketches
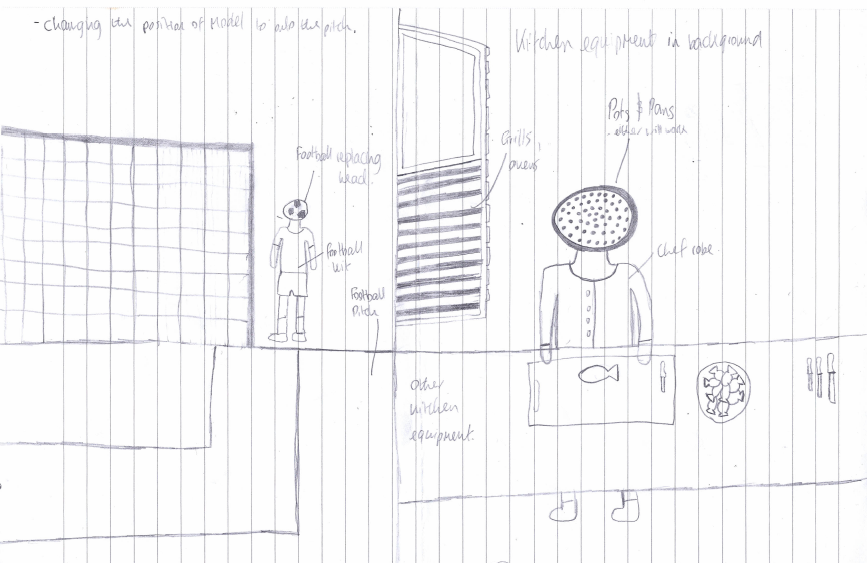
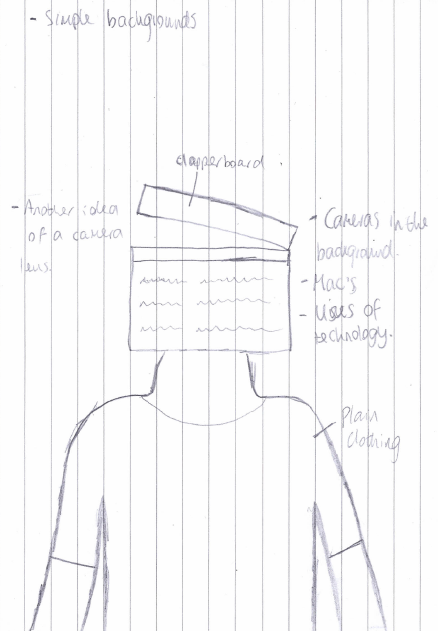
From four hobbies, I had to pick three as the other one did not fit in with these three as well. These are my drawings of what my final pieces could look like and what I might need in the photographs to make the photographs look that much more realistic.
Photographers
Bryan Durushia
Second-hand Images |
This photographer inspires me with my idea because he shows something replacing the head of a model with an object. He doesn't only place anything on his models head, he uses an object that is relevant with his environment. My idea is similar to this because I want to show this but through hobbies and an environment that fits in with those hobbies. I like these photographs because they haven't been left plain and simple, the photographer has added more detail by fitting more of the objects around the photograph or made the photograph black and white using Photoshop.
The colour of these photographs have been left quite simple which can be quite dull as they are given an 'Indie' genre type theme. The photographs are quite low contrast as they are trying to show off the dullness of the photographs. These photographs have been composed in a portraiture style as they have been shown to be taken straight on. The photographs that the photographer takes are taken outside and during the day. The photographs are lit through natural light as he takes outdoor photo shoots. These photographs have been manipulated by the models head being replaced with an object that fits in with their environment. This has been done through Photoshop. |
Michael Weintrob
Second-hand Images |
Michael Weintrob takes photographs of people and instruments and replaces the instruments with his model's head. The relationship between the photographer and his subject is that he has a passion for music which shows a representation of music through his photographs. The photograph hasn't been distorted in anyway but it has been manipulated with instruments replacing the model's head. The theme of these photographs show fabrication as the photographer has shown manipulation.
The colours in these photographs are natural colours off clothes and props. With each instrument, they have tried to match the genre of the instrument with similar clothing. The photographs taken aren't to high in contrast neither are they low in contrast. One shot has been consistent throughout all of these photographers photographers which show a portrait structure throughout. The photographs are shown to be taken inside, in a studio. The photographs are shown to be lit with the lights face on with the model to show that the model is the subject. The technique of composition have been used as you can tell throughout the series of photographs that they would all look the same but with just different models and props. The photograph has been manipulated with the head being taken off with an instrument replacing the head of it. |
Testing the 'replacing head' technique & working in the style of Photographers
Original Photograph
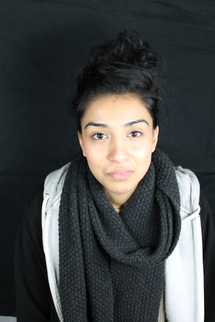
This photo shoot consisted of a class mate where I had taken a few snap shots to see if I am able to do the technique I intend to do.
|
Photoshop
I have shown a very brief Photoshop process as I have shown the process in the photographs above. This Photoshop process has shown me using the image to replace the head and the image actually being Photoshopped onto the head of my model. I have to work on my Photoshop skills as the final photograph did not come out how I intended it to come out.
|
Final
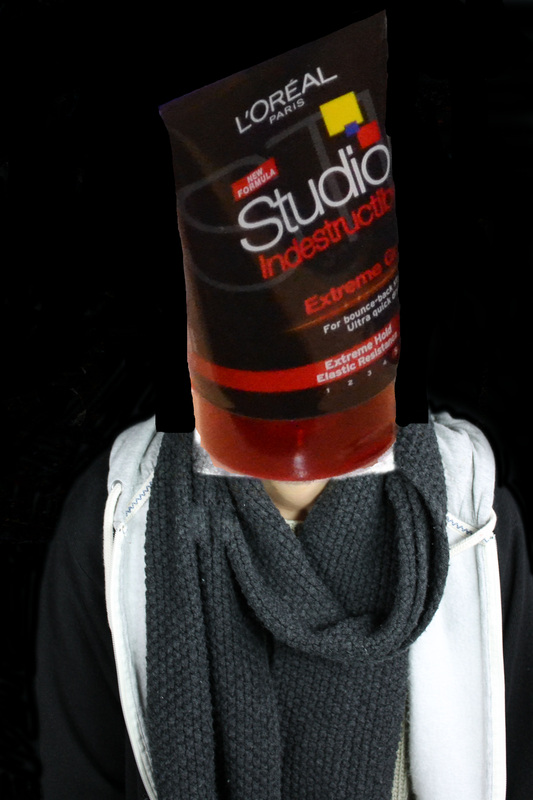
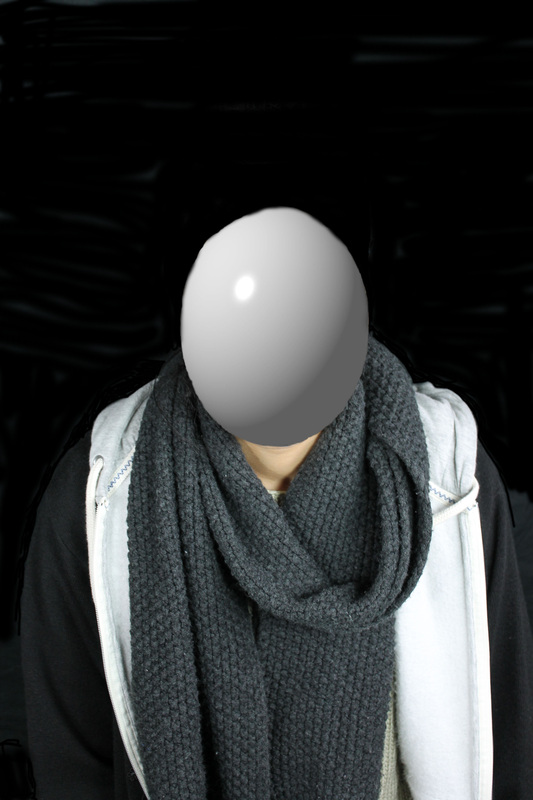
In the final photograph, the technique didn't turn out correct as it was done over two days. I had taken the head off my model one day and on the next day I had put the object replacing my models head. Doing this created a gap between the photograph of my model and the object. I had taken took much off the head of my model which made it harder for the subject to fit the model's face perimeter.
|
Original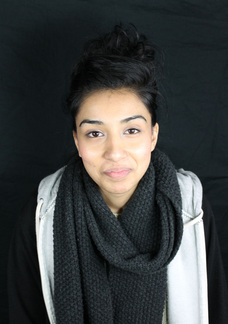
I had used a classmate as a model for my testing shots as I was just testing if the idea would work. I had taken a few portrait photographs of my model with the lighting heading face on.
|
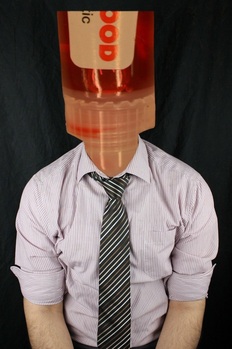
After Photoshop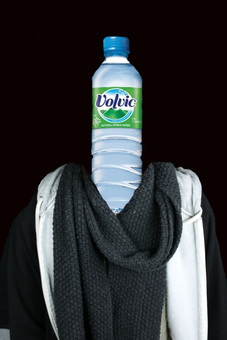
As this is just a testing photo shoot, I used a water bottle to replace the head. The first thing I did was create a new layer and then erased the part I didn't want to show. I then placed the image of the water bottle on this image then softened out the edges. I then used the brush tool for the background so the colours wouldn't look odd. I had to use the brush tool on Photoshop to make sure the background was all the same colour and look as natural as possible. This didn't turn out how I want because it makes the subject look just as fake.
|
Original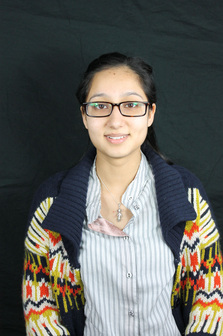
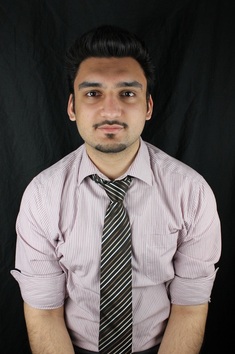
I used a different model to replace the head with a different object so I am able to get used to this Photoshop technique. In this photo shoot, I used the lights facing towards my model.
|
After Photoshop
For this photograph I used the same technique as I did with the first. It worked the same but the object I used to replace the head should have been different as it didn't fit in with what I wanted to do. This photograph was executed in the correct way but I had to make the background one shade of black using the brush tool instead of using the natural background which is a backdrop in a green room.
|
Original Photograph

|
Photoshop
This is showing the Photoshop process of how I got to the last stage from the original photograph. I first created a new layer of the image and then erased the head of my model. I then placed a round object that is an image on the model then used the brush tool to make the black which I then softened the edges of the object.
|
After Photoshop
This did not come out how I intended but the idea did work for what it came out to be. The subject of the photograph needs to be more round and it needs to look like its apart of my model.
|
Original Photograph
I had taken a fresh set of photographs to show that I am able to do the 'replacing the head' technique and used some of the photographs for my final drafts.
|
Object Used
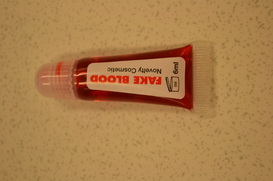
This is one of my final experiments before I started working on the draft for my 3final pieces. I used this object as it suits the idea of manipulation of the photograph.
|
Final
This is the end product of knowing how to do the replacing the head technique which came out how I intended to. I added depth to the photograph technique as I made the object look like it is coming out of the model's neck which makes the subject of the photograph to actually be there.
|
Draft for Final
Set-up of Green Room
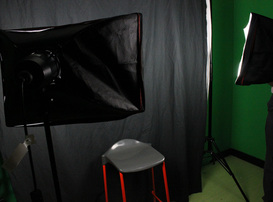
The reason I have chosen this set up in the green room for this photo shoot is because I wanted the light to shine directly onto the model so everything in the final photograph would would be completely visible.
Original Photograph Of Model
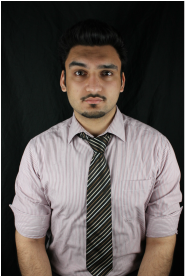
This is the image I chose for this practice shoot as the composition is good and the lighting is good enough to see the subject.
|
Original Photograph Of Object
On camera this image looked brighter than what it looks like on here but I increased the brightness on the photograph to make it fit in with the lighting with my model.
Photoshop
In this photo shoot I have shown the Photoshop process to show how I got the object to replace the model's head. This involved me increasing the brightness of the object because on screen the photograph came out too dark. I then placed the photograph on the photograph of my model and placed it in the correct position. After the photograph had been placed I removed the edges of the photograph and went close the edges to give it the sharpest look possible. I used the blur tool to soften out the edges so the object looks like it is meant to be on the model which makes the photograph more affective.
|
Final Outcome
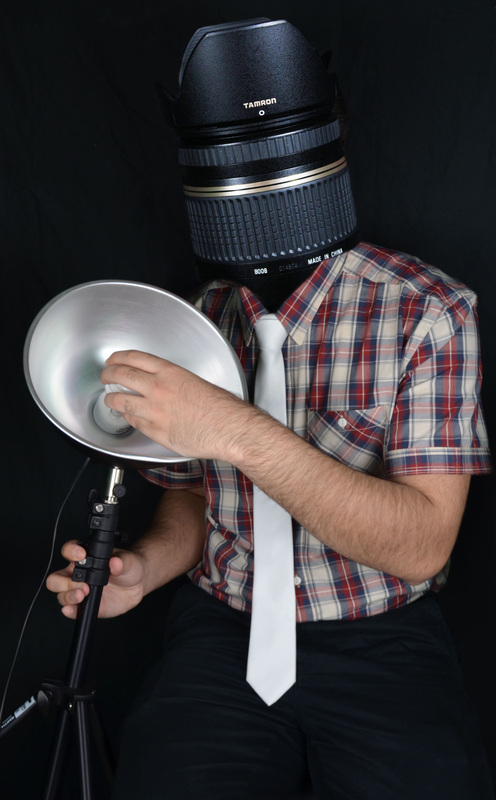
The final photograph shown did come out how I intended it too but what could have gone better is the depth of where the end of the object is going into the collars of my models shirt. This could be more realistic as if the camera lens is supposed to be there. For the camera to look like it was supposed to be there I had to blur the edges. For my final piece I will get the model to change their clothing as I want more plain clothing. In this final piece I am also going to make the environment around my model look like a studio so I will surround my model with studio lights.
|
Set-up of Green Room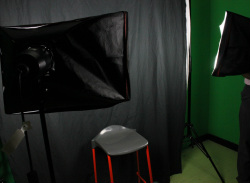
The photographs taken with this set-up are all from the same photo shoot as I needed the same lighting throughout these series of photographs.
Original Photograph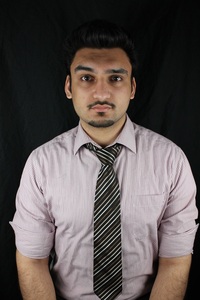
This photograph is appropriate for drafting one of my idea which will lead to having a final piece with a similar concept.
|
Original Photograph of Object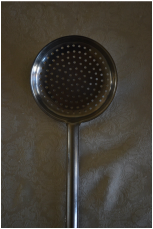
I chose this object for my draft because it would give me an idea on what I could do better for my final piece. Using this object made this draft look too simple which is why I am not going to use the same object for my final piece.
PhotoshopThe Photoshop process was simple because all I had to do is use the background easier to erase anything around the object and then place it onto my models head. All I was left with to do is make the object fit in with the models head, and make it look neat and tidy so everything is able to fit into place. I used other tools such as the blur tool to blur the edges to make everything fit in with the background as well so my model and object would not look out of place.
|
Final Outcome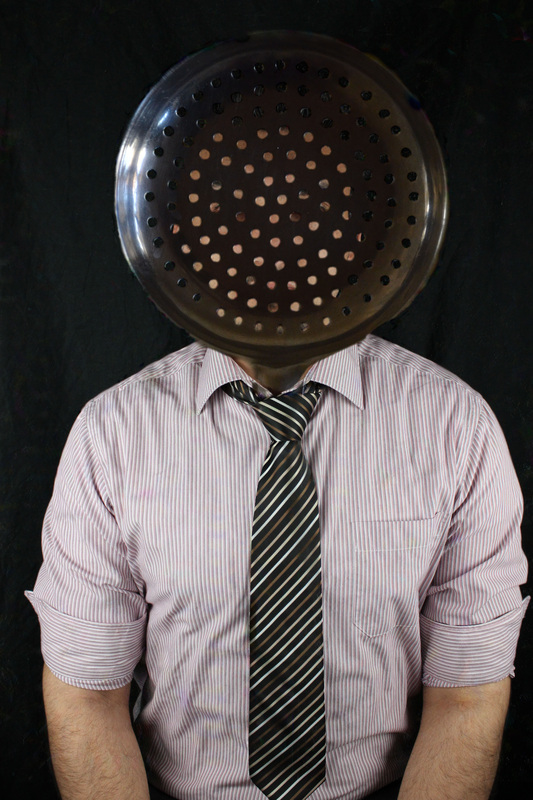
The final outcome was not completely how I intended it to come out as the edges of the object aren't as neat as they should be. Also, where the neck is of my model, the object hasn't sat on the neck as how I intended. This did not work as the shape of the object was too big itself, but if I had made the object any smaller, the object would look out of place. What I am going to do to make my actual final piece look better, is to use a different kitchen accessory to make my final piece look more interesting. Also, to make my final piece look more interesting, I am going to get my model to change their clothing. I am going to get them to wear a kitchen overall which would make the object fit in with the environment and in the background I will take pictures of kitchen accessories so the final piece will make sense.
|
Set-up of Green Room
The set-up in the green room was the same as how it was in my previous photographs above. This is because I wanted the same style throughout these series of photographs.
Original Photograph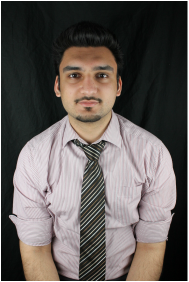
This photograph was most appropriate to use for my draft as my model was looking directly at the same with their head up. This made the Photoshopping a little easier because I had to sit the object on my models neck.
|
Original Photograph of Object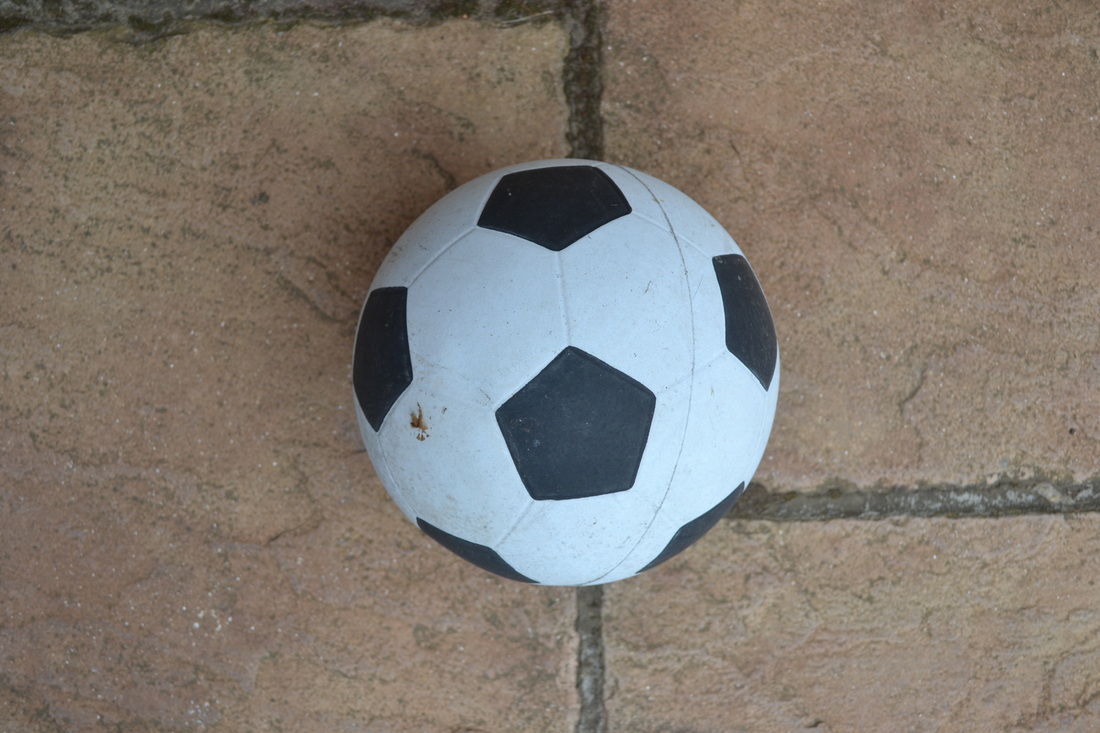
This photograph of my object went well with my final draft because the lighting was good because of the natural light and no shadows are surrounding the photograph.
PhotoshopDuring this Photoshop process, I had to select my model and place him onto a new blank file. After I did this I had used the eraser tool and erased the head of my model. In a separate file I had erased everything around my object and placed it on my models head. After this was done, I cleaned up any unnecessary parts of the photograph and made the final outcome look as natural as possible.
|
Final Outcome
The draft final piece came out how I intended as I did not have to add any background as it is just a draft. To improve this and make my final piece different, I am going to include a background of a set of goals to make the object fit in with its environment. I also going to change the clothing of my model and get the model to dress more 'street' as football can be known for a street sport as well as a professional sport.
|
Preparation for Final
Photo ShootOriginal Photograph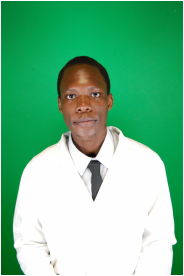
I used this photograph for my final piece because the composition and lighting is how I wanted it to come out. The clothing was made very bright by the lighting which was beneficial because the clothing needs to stand out with the sort of background I have for this photograph.
|
Original Photograph of Object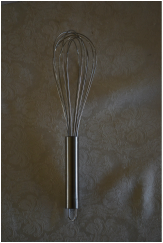
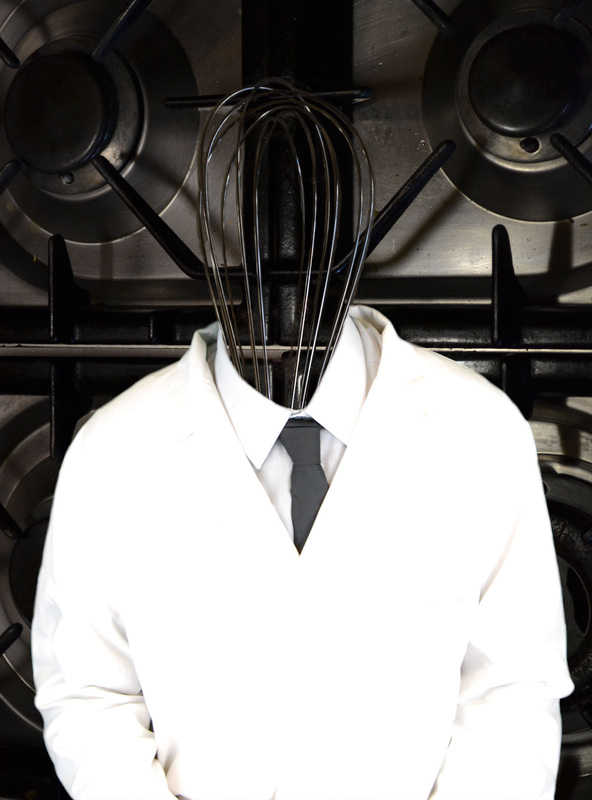
Using this object, a whisker, for my final piece would be more of a challenge and would make the photograph more interesting. It would also show that more time and effort has been put into the final piece as I have used a more difficult object.
Original Photograph of Background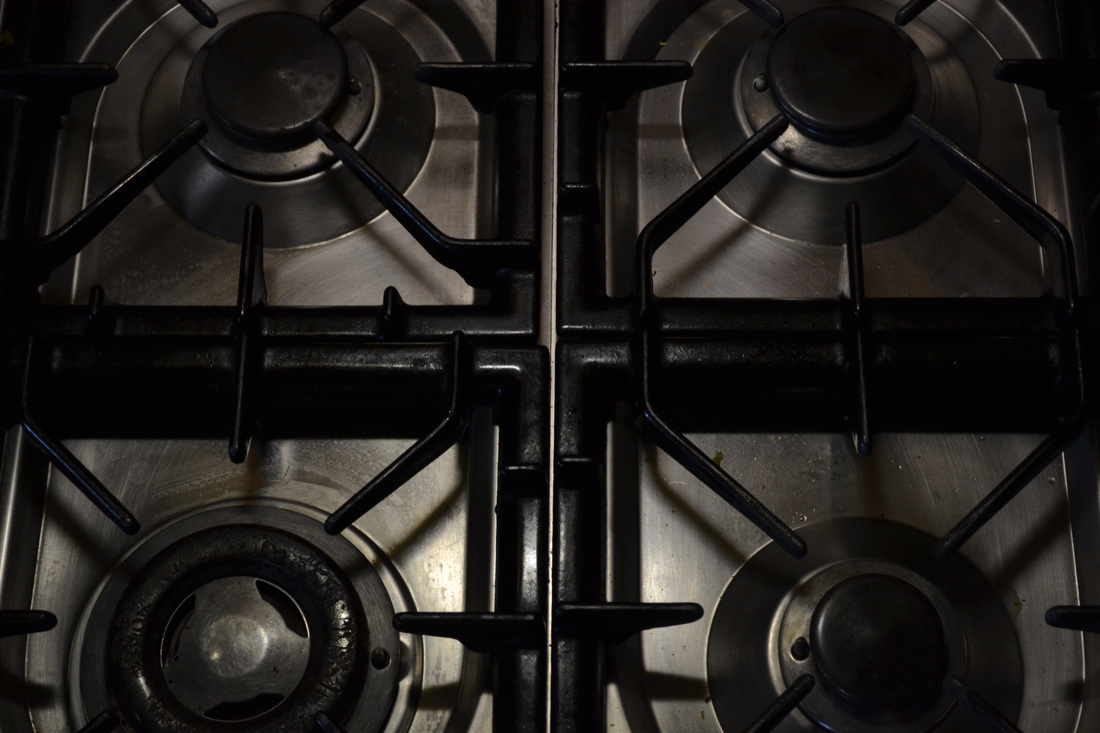
Using a stove for the background of my final piece would make the clothing of my model and the object used, make sense for what I am trying to show. This photograph used of the stove shows good amounts of lighting for my model and object to still be shown.
|
PhotoshopIn Photoshop, I had to select everything on my model and move my model onto a plain new file with no background. After I had done this, I erased the head of my model and made sure the edges are neat and nothing looks out of place. Next, I opened up the image of the whisk and erased everything around the whisk and the little parts I didn't need inside the whisk. After this, I had placed it on my model and kept on moving the whisk around to experiment what would look the best. Doing this, I came to a conclusion that showing the top bit is the best idea as it blends in with the body of my model. At the end of all this, I cleaned up any parts that are unnecessary to everything would look neat. I also changed the contrast of the whisk as it looked dull compared to the stove in the background.
|
Set-up of Green Room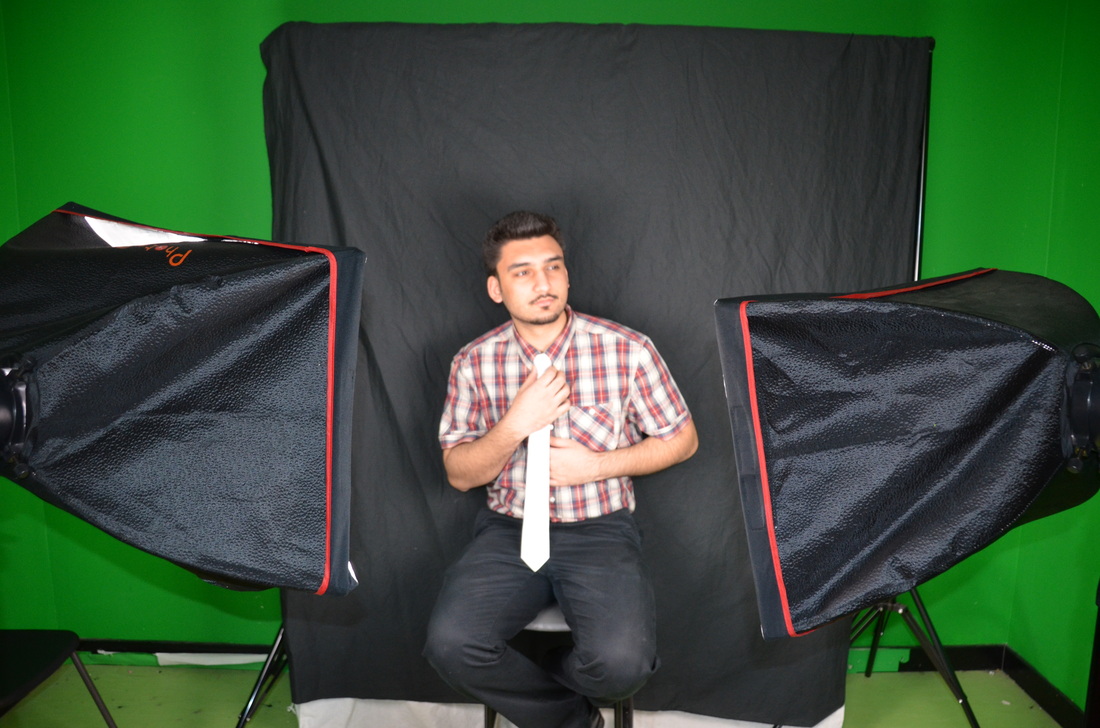
The set-up of this photo shoot is similar to the photo shoots I have done for my draft pieces. This is because the lighting gave the effect I wanted which also meant that I did not have to play around with the brightness and contrast as much on the original image.
Photo ShootOriginal Photograph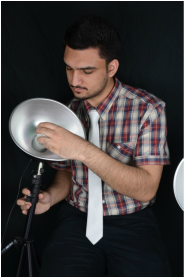
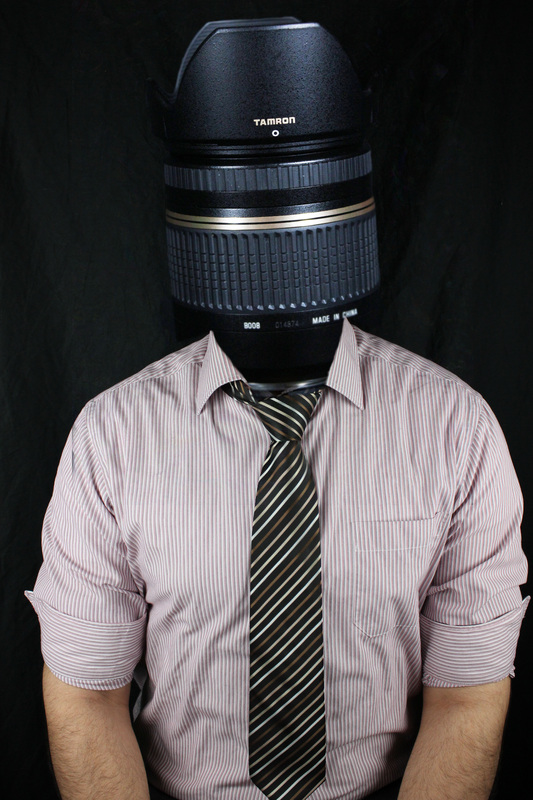
When this photograph was taken, I had told my model to mess around a little bit while I take photographs to experiment what might work well. I also took photographs where my model is looking face on at the camera but those photographs looked too formal. This one turned out the best because it was the most natural pose.
|
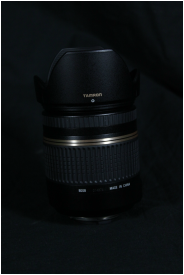
Original Photograph of Object
In my draft I had used a lens to replace my models head, and this turned out to be successful. I did another photo shoot on just taking photographs of the same lens with the same f stop and aperture than the one in my draft piece. I did this because I like the affect it gave the photograph itself even if it did mean that I have to adjust the brightness of it in Photoshop.
|
PhotoshopIn Photoshop, I had to crop out the other light source which was edging into the photograph. This made my photograph look like one photograph after the cropping had occurred. The image of the lens I used, I placed this onto the photograph of my model and adjusted it so it would fit my models head and slightly tilted the lens so the lens would have more depth. After I done this, I erased all the parts I didn't need of the image so just the lens is on show. Then I had used the blur tool to make the image look like its blended in with the background so it would look as natural as possible. My model had a couple of spots on show on his forearm, so I used the spot healing tool to erased these spots.
|
Photo ShootOriginal Photograph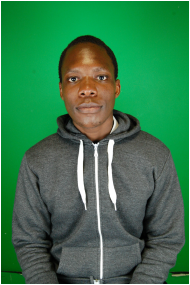
For this photo shoot, this photograph was the best as it is well composed with the correct amount of lighting. This also turned out the best as my models back is straight, so the photograph will have more energy, with my models head looking directly at the camera.
|
Original Photograph of Object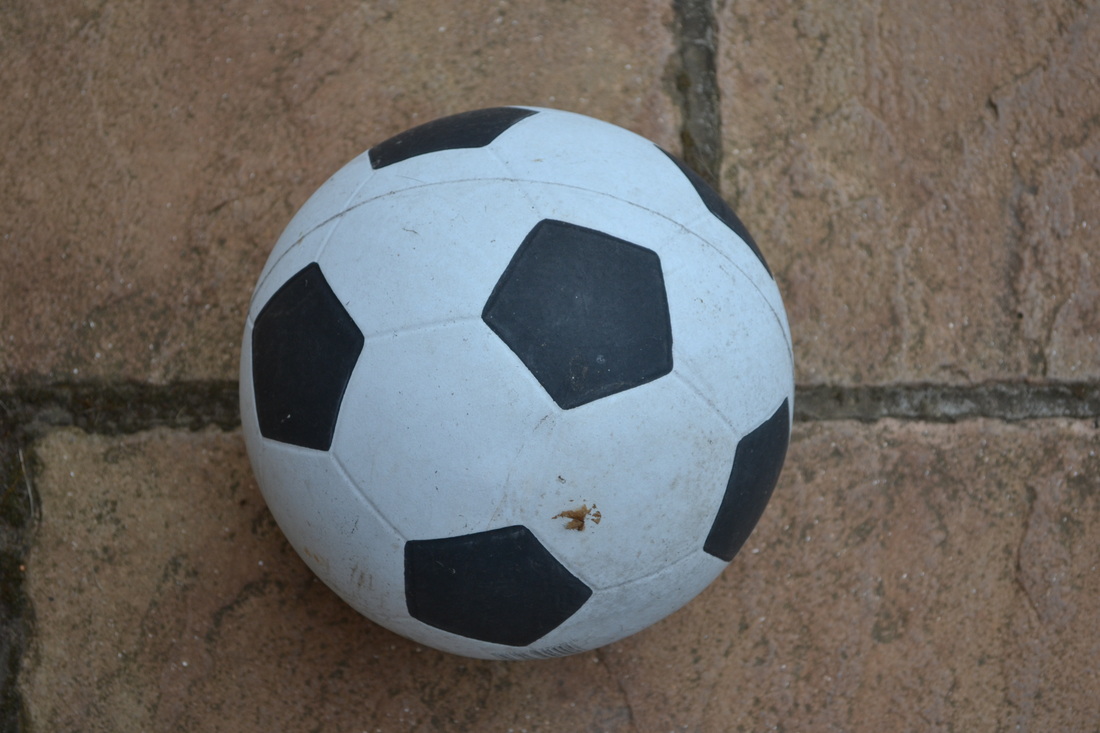
This photograph was the best for my final piece as it gave realness to my final piece. This is because the object looks like it has been used, when you look at the photograph up close. For example, the patch of dirt near the bottom of the photograph.
Original Photograph of Background
This photograph turned out to be the best for the background as the goal posts were set up in the correct way and I had taken the photograph so the goals would look like they're in the top left hand corner. All I had to do is crop the photograph to give the photograph more emphasis on it's position.
|
PhotoshopOn Photoshop, I had selected my model and placed him onto a new file. Then I used the eraser tool and erased the head completely. On the image of the football, I went around the edges of it so none of the background in that image was being shown. After I had done this, I place the background in of the football goals. The image was too short so I had to use the same image and take a part of the grass and blend it in with the other part of the grass. I then placed the image of the football on the head of the image of the model to get the look I wanted the image to have. I also changed a bit of the brightness and contrast of the image to make it look as natural as possible on the models head.
|
Evaluation
In my final pieces, I want my models heads to be replaced with an object that could be known as a hobby. In this case that is football, cooking and film. To do this successfully I had to do mock-ups of what my final piece may look like so I would know what I can do better for my actual final pieces. I had learned that I could put in a background that suits the environment so the object replacing the models head would not look out of place. The photograph represents what someone's hobby may be. I have not called the photograph anything as it is already evident on what the photograph is trying to show. The photographs have been Photoshopped to give away the 'replacing head' technique away do other people can be more interested when looking at the photographs.
The colours used can be quite dull. For example, in the cooking final piece as the only part that stands out is the body of the model. But the colours can be quite vibrant as when in the film final piece my model is wearing a red and white checkered shirt which draws attention to the picture straight away. This affects the mood of the photographs because others will look at the photograph and try figure out what has been done to get the final outcome. The contrast in the photographs are not high and they are not low. They are more or less in the middle. This is because I want everything in a single photograph to look as natural as possible. The same patterns are consistent through the three photographs as the concept is similar.
The photographs were taken inside a green room where in two photo shoots I used the plain green backdrop but in one photo shoot I used a black backdrop. All three photo shoots were lit the same with two big light sources facing my models. This is evident in my photographs as the body of all my final pieces are well lit. The technique I used in these photo shoots were composition as they had to be taken in a portraiture format. Another technique I used on Photoshop was the 'replacing the head' technique. My final pieces have been manipulated. I have used Photoshop to change the image size, replacing the head and changing the background with other tools such as the blur tool. eraser tool and the spot healing tool.
Looking at my own photographs, I feel that they have been taken and manipulated successfully. If I was in somebody else shoes, they would be the type of photographs to look at twice to fully understand the concept of each final piece. I feel like this because as I was doing my photographer research, I had to look at each photograph again and again to fully understand what the photographer is trying portray.
Final Pieces