Personal Investigation: Macro Photography
I have chosen to do macro photography for my personal investigation because I have taken an interest in the way how when a photograph is taken, ever detail is shown in an object which can be shown from different angles as they are more close up than any other photograph. I have been even more influenced in doing macro photography as I have studied an artist called Brassai. When I was studying this artist, I had taken photographs of a subject and then zoomed into the subject using Photoshop but only zoomed in to specific areas of the photograph.
Photographers
Steve Holmes
|
|
These photographs show that the artist has worked in a macro photography style showing clear detail in his photographs. This photographer favours photographers of plants over most things as he says he finds them the most interesting.
These photographs are appealing to me because it shows detail in the photograph as he shows similar aspects to them but they are all different. He uses droplets of water in his photographs which add more of an affect to the photographs which makes them more interesting. The colours used in this photographers photographs are quite bright and are able to catch someones eye as they are contrasted well and have been set at the correct brightness throughout his photographs so they do not look fake. |
Inspiration
|
|
_the The photographs shown for inspiration are of different things. My favorite photograph from this set of photographs is the lighter being sparked. This is because detail has been shown and this may have taken some thinking through with the camera settings as well as Photoshop.
The photographs are very much in their own colour. for example, the colour shown is exaggerated to show more detail in the photograph and to fit the photograph in its own environment. I like this feature of these photographs as they look surreal and look like something that they are not meant to be. The way the photographer has taken the photographs caught my eye as that's whats made it look like something it isn't. |
During this photo shoot I had gone around a local area and taken photographs of plants from different angles and I have uploaded all the photographs that did work out and all the photographs that didn't. For example, the photographs that turned out too bright; were out of focus or not angled right.
|
|
I used this image as one of my mini final pieces because I thought it was the correct image to use as I want to give the image an affect that it looks like the photograph is coming out towards you.
As I was editing this photograph I had changed the brightness and contrast to give the photograph itself, more colour. After I used the 'sharpen' tool to make the points of the leaf stand out more to the rest. To make the leaf stand out the most to the rest of the photograph, I used the 'dodge' tool to make it obvious I want the leaf to stand out. And finally I had used the 'burn' tool to darken the whole of the background which shows that the leaf is standing out the most. |
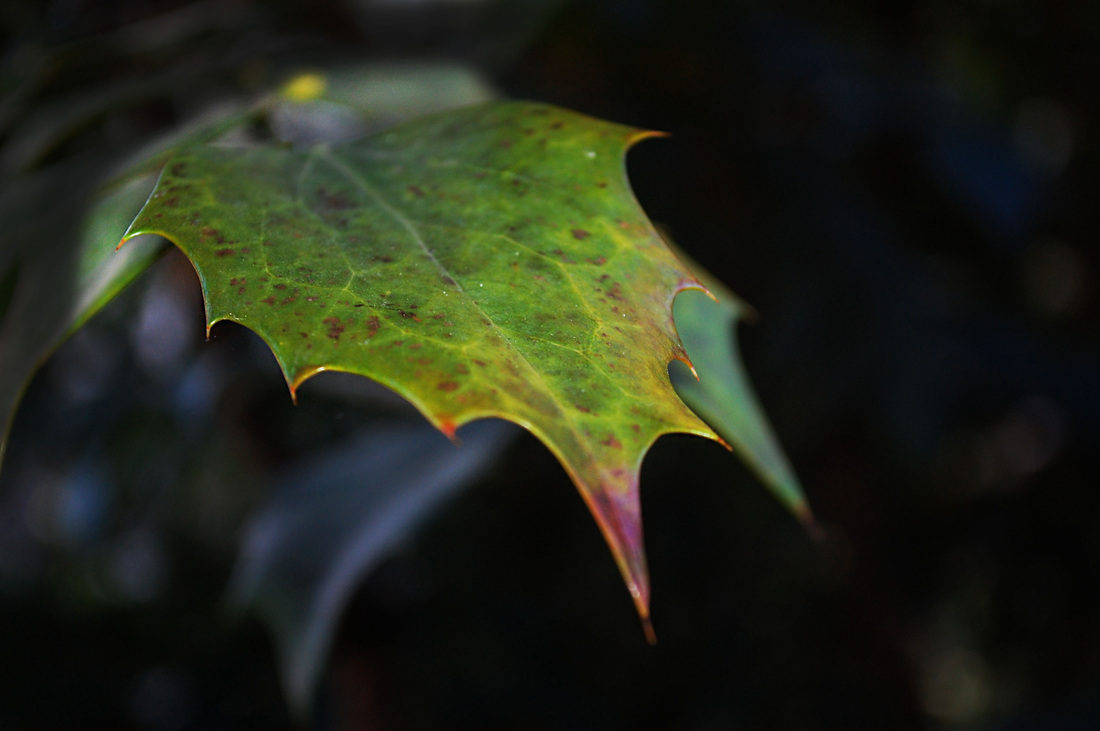
This is my final outcome from this photo shoot. The final photograph came out how I intended as I wanted the tip of the plant to look like it is about to come out of the photograph itself. I did this by blurring as much as the background as possible so the subject would stand out more. To make the subject stand out even more, I had sharpened the subject to get the final outcome I want.
|
|
During this Photoshop process, I had adjusted the levels the photograph should be at which I sent to 'Auto' which gave the photograph the correct level.
I had then slightly decreased the brightness and slightly increased the contrast which gave the photograph more of a darkened affect. Then I used the sharpen tool to make the small branches on the plant stand out which I then went over with the dodge tool to it would stand out more. I then used the burn tool to darken the background even more and then used the smudge tool to give the back of the plant a blurry affect. |
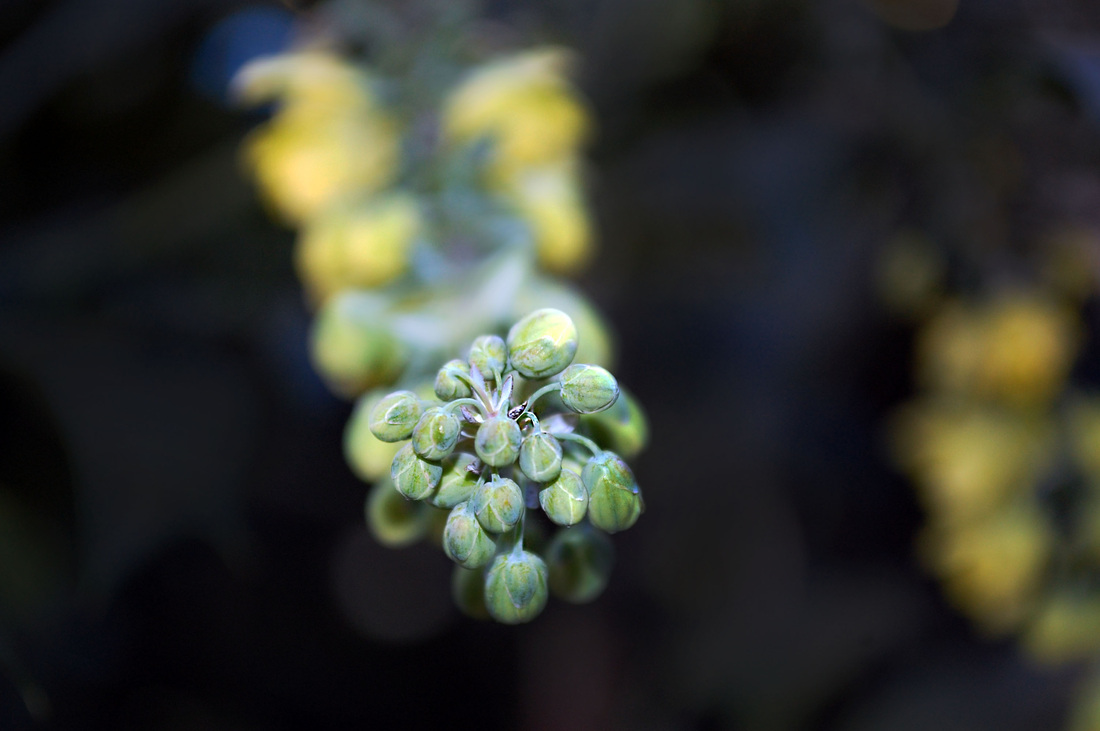
This is my second final piece. The photograph I had in mind came out how I wanted it to, practically. This is because I wanted to subject of the photograph to look like it is coming out of the photograph. I was able to do this by blurring the background as much as possible and to sharpen the tip of the subject.
|
|
When I was editing this photograph I had increased the contrast and left the brightness the same as I thought it didn't have to be altered.
I used the sharpen tool so the edges of the photograph would stand out and also so it would have a sharp affect. I went over the top of the leaf with the dodge tool so the leaf would look brighter and also give the photograph an effect to stand out more. |
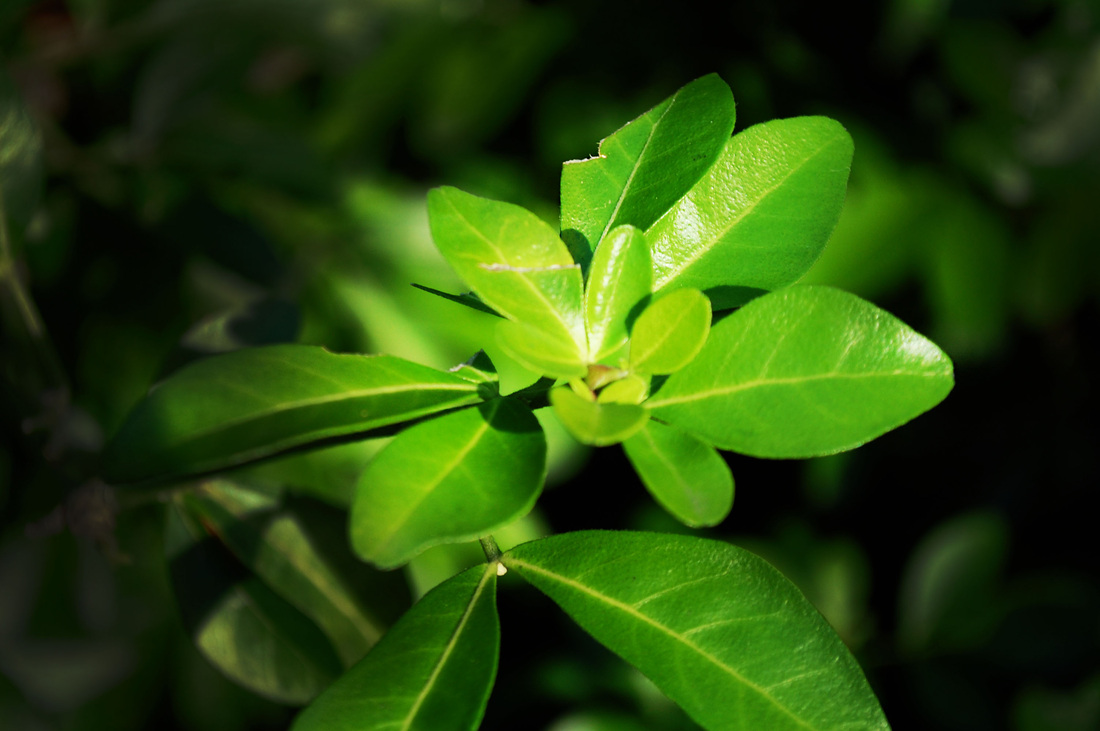
In this final piece, the centre is very bright already. So my main focus was to blur around the sides of my subject which would automatically make the subject stand out even more. I added some hints of sharpness to the subject to make the subject stand out more.
|
|
In this photograph I did not change the contrast or brightness because I thought the photograph was at a good level to just been tweaked.
I used the sharpen tool for the subject to make it stand out more and then with the burn tool I darkened the background to give the photograph an affect so it looks like its sticking out of the photograph. I also used the dodge tool. I went around the edge of the image and applied this affect to make the photograph look more realistic. |
|
|
In this image I had altered the contrast higher because it looked like there wasn't enough colour in the photograph.
I had then sharpened the leaf to make the subject stand out the most compared to the rest of the photograph. I then went over the lighter parts of the photograph with the dodge tool which had given the photograph an affect which makes the subject obvious. Finally, I used the burn tool to darken the background which would make the subject stand out even more. |

In this final piece, the background had already been blurred due to camera technique as the focus was set to auto. This means that I did not have to do as much Photoshopping on the background because the subject stood out quite a lot already. I added hints of sharpness to the photograph to make the colour in the leaf more vibrant as it would stand out more.
|
|
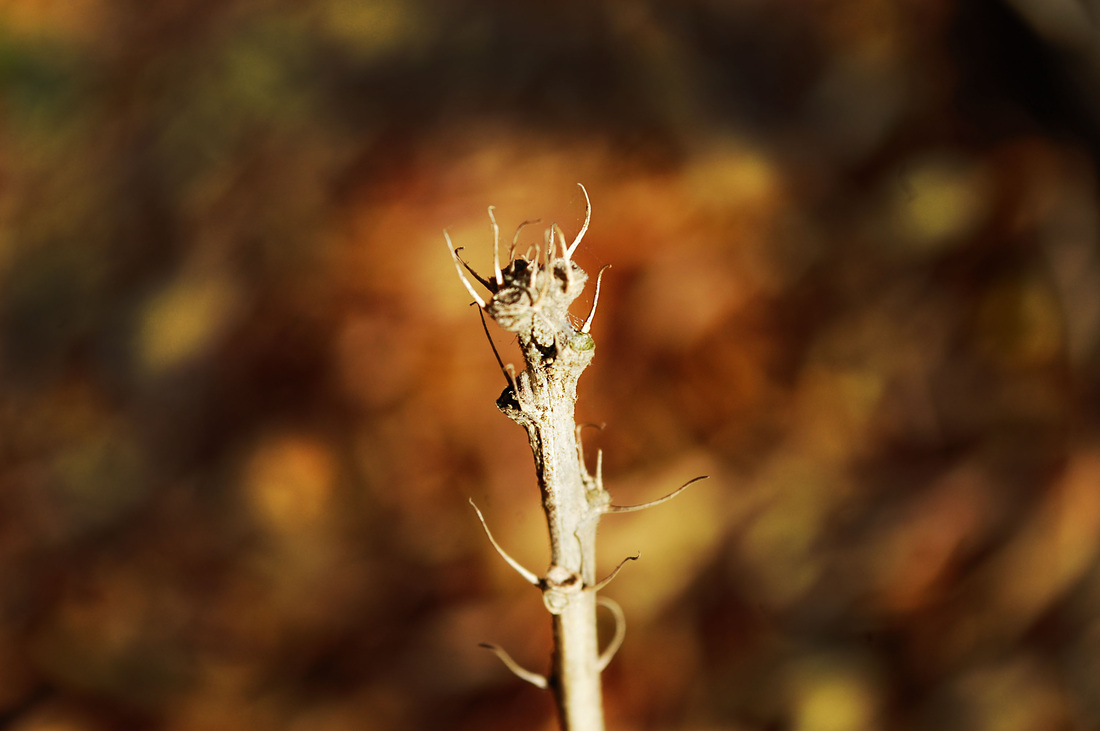
In this photograph I had increased the contrast to give the photograph more in-depth colour.
I also used the sharpen tool to create a detailed affect on the subject of the photograph. Then I went over the sharpen tool with the dodge tool to brighten the subject so after I had applied the burn tool on the image it would almost look like the subject is standing out. |
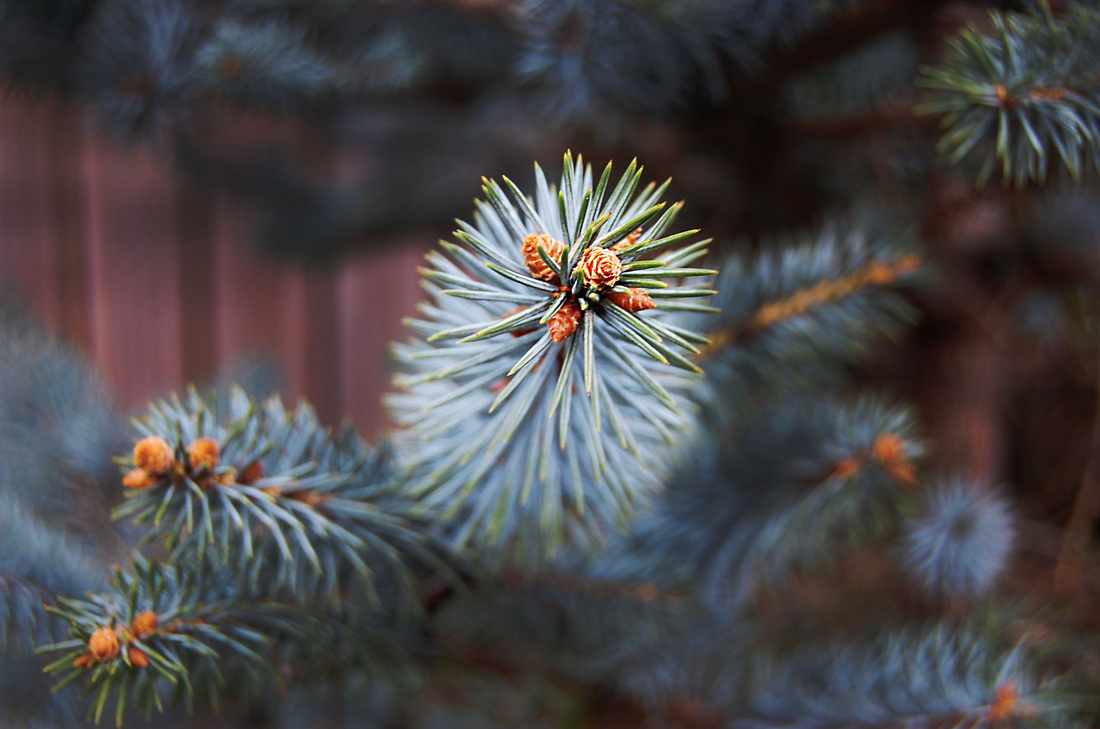
In my opinion, this photograph was most successful as I started off with a photograph with everything in focus. As I progressed through the Photoshop process I had made the middle of the photograph the subject. I blurred the background completely with hints of burning the background as this made the middle of the photograph stand out more. To make the subject stand out as much as possible I had gone over the middle of the photograph with the dodge tool and the sharpen tool.
|
|
This photograph had been done so the fence is standing out more than the background but you can still make out what the background is. To do this I increased the contrast to give the photograph more colour. Then I used the sharpen tool to sharpen the fence which I then went over with the light bits with the dodge tool and the darker parts with the burn tool. Then I had given the background two coats of the burn tool which gave me this final image.
|

Starting off with this photograph, the background was already blurred so I did not have to worry much about make my subject (the fence) stand out as much. I went over the background with the blur tool once, sharpened the my subject and went over the light bits of my subject with the dodge tool. I also used the burn tool for my background because it would make my subject stand out much more.
|
|
In this image I had selected the subject and adjusted the brightness and contrast to a different standard to the rest of the photograph. I had sharpened the orange part of the photograph and then used the burn tool on the back ground of the photograph to make the subject stand out.
|
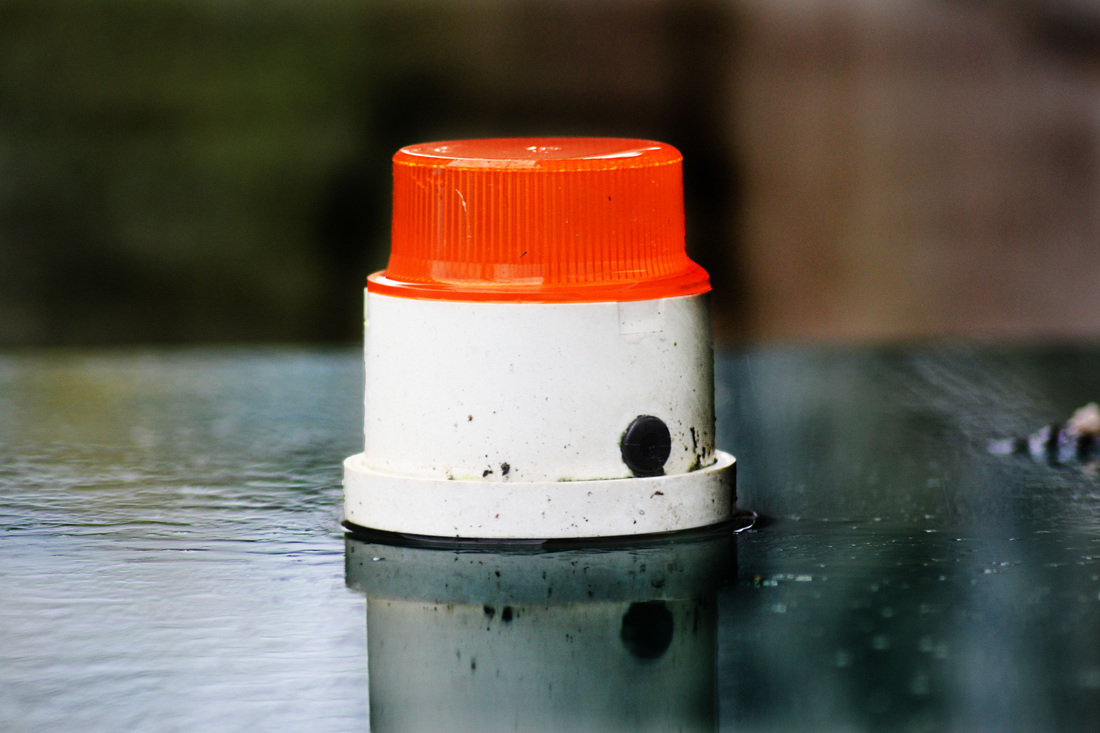
In this final piece, I was trying to show a background, mid-ground and foreground. This was success as I made the background obvious by blurring behind the mid-ground and made the foreground obvious by sharpening around the foreground.
