AO1
'Develop ideas through sustained and focused investigations informed by contextual and other sources,
demonstrating analytical and critical understanding.'
demonstrating analytical and critical understanding.'
Brainstorm
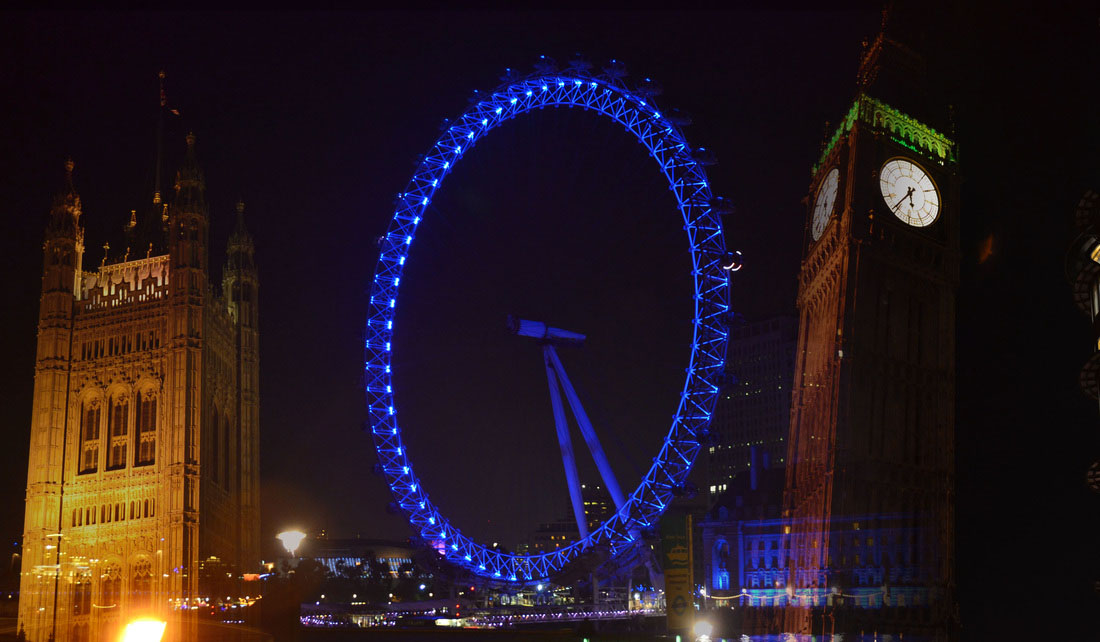
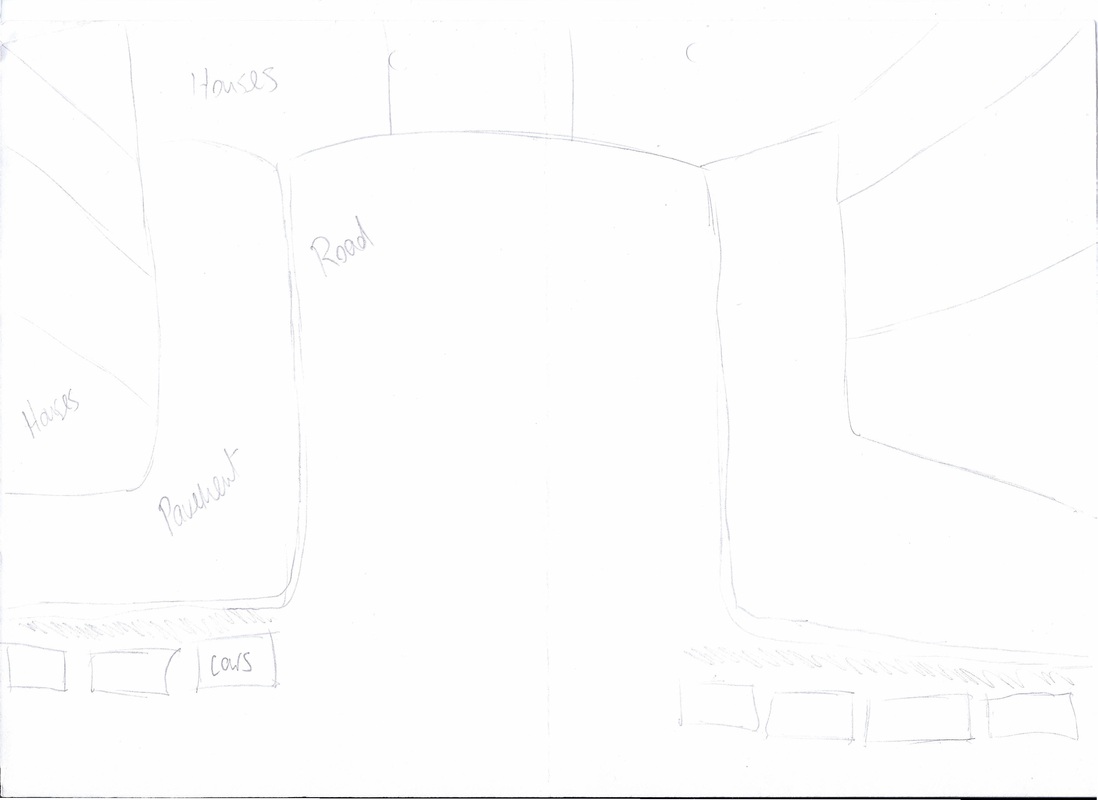
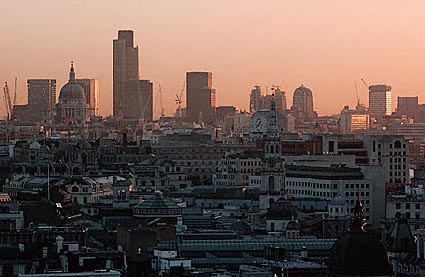
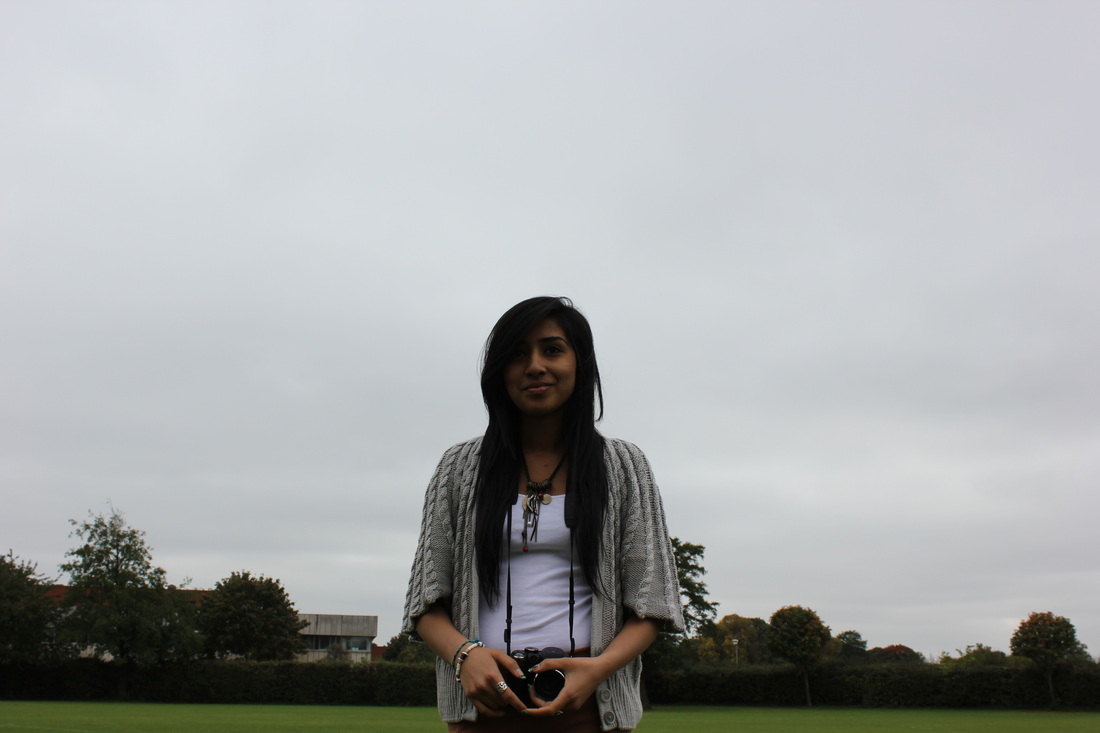
I put all my ideas onto a A4 sheet to show what I'm going to do, or what I'm going to build up to do. My theme is the streets so I begun to decided different ideas. For example, I had ideas of taking photographs of old streets and making them look traditional and old fashioned using Photoshop. Another one of my ideas were to merge two pictures together to show a comparison of two different parts of the streets. The idea I focused on is to merge different parts of London, together. For example, Big Ben and London Eye.
|
Drafts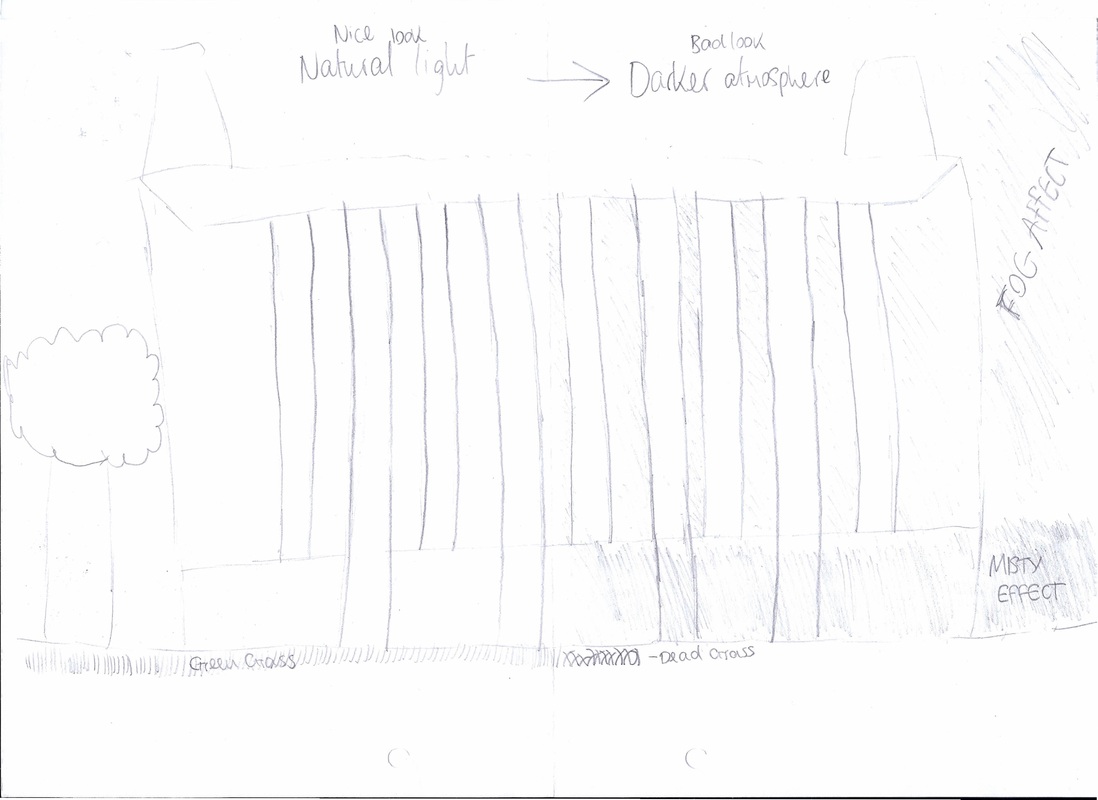
Draft 1
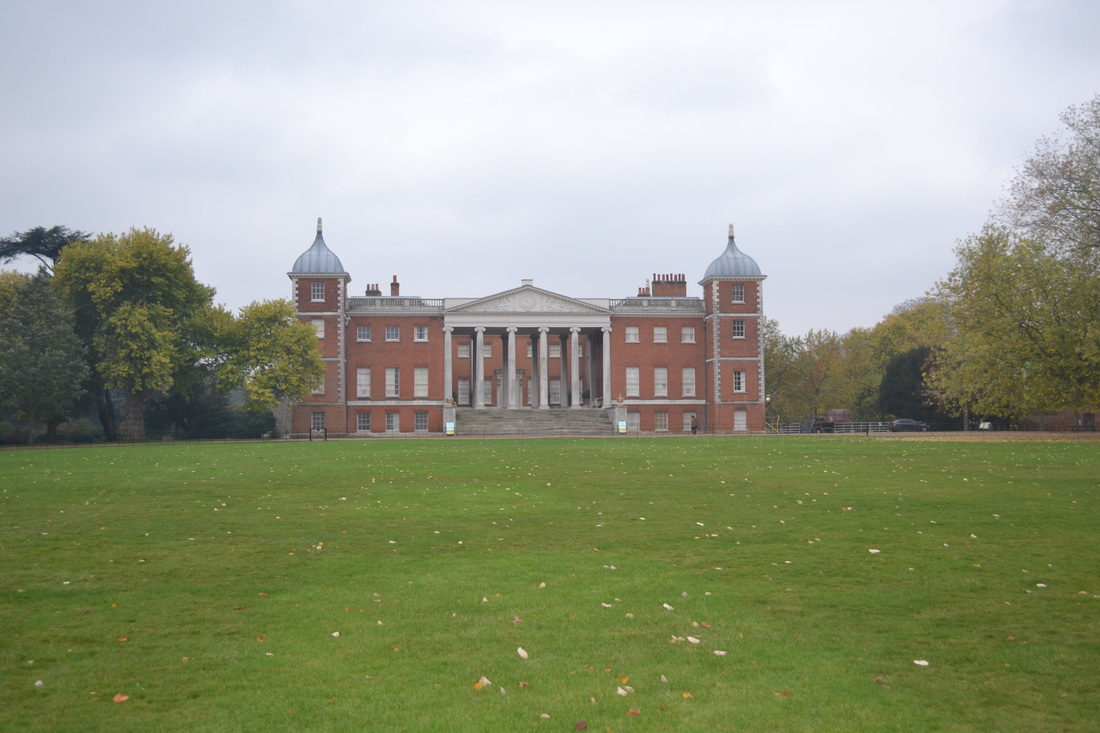
In this draft, it shows two sides to the house in Osterly park. I was going it show the normal side to the house then fade in a dark side to the house showing fog, mist and cracked windows to give it a horror look as well as a street look.
Draft 2
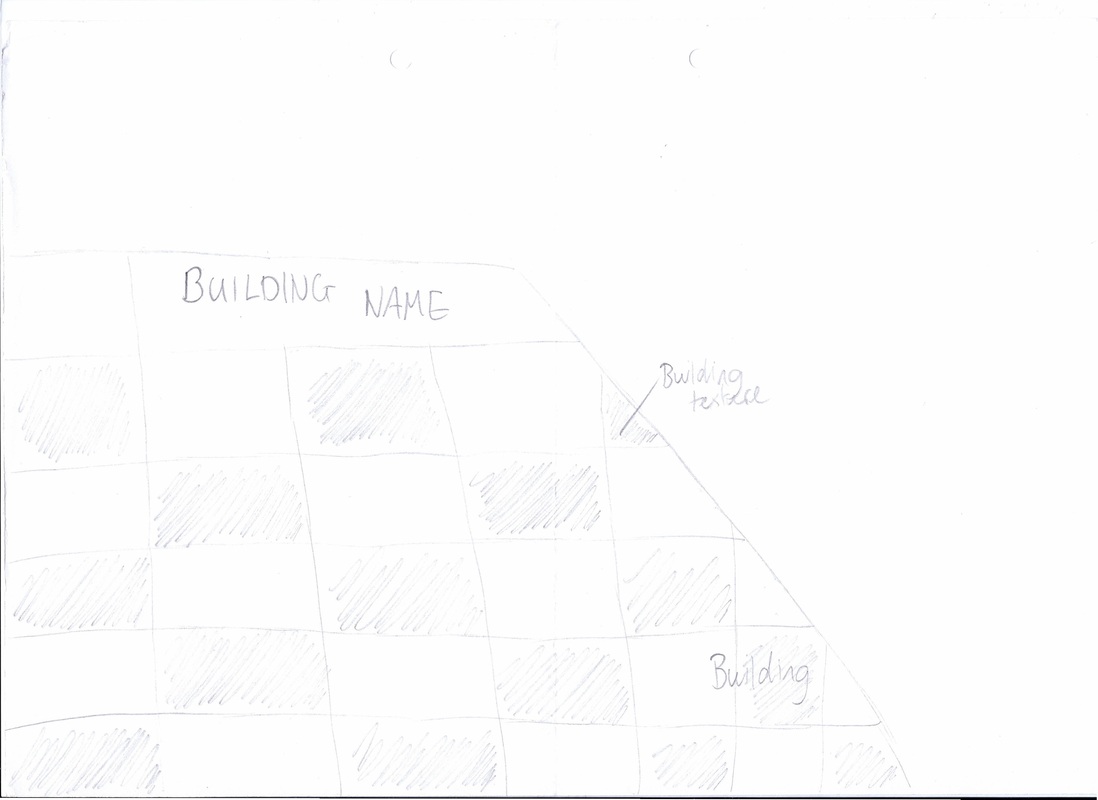
This was one of my ideas because it shows a focus of one thing, for example the texture of the building I was going to use. I didn't chose this picture because it didn't seem like something, someone would look at twice.
Draft 3
For this idea, my main focus was the actual streets. My plan was to show a comparison between the narrowness of different roads. I was going to do this by merging different roads together and showing the comparison between them.
|
Eugene Atget
|
Eugene Atget was born in Linbourne, Paris in 1857. Eugene Atget used to be a actor, but he came to the age of 40 he had quit acting and experimented with painting. His painting skills had lead him to being a photographer. He was a unknown photographer but that is because he was focusing on his techniques as a photographer. The pictures he made are seductively and deceptively simple, wholly poised, reticent and dense with experience, mysterious, and true. Eugene's work was know as unique as he had two working levels, these were making a cataloger of fruits in the French culture. This made his work more sophisticated than other photographers. When Eugene set himself tasks he wanted to interpret a complex, ancient and make a modern day time, to look traditional. Eugene Atget wasn't the most well known photographer but he followed the six rules of photography. For example, Depth Of Field, he had made the background very light to make it look bokeh but everything else is in focus. He had also used Use of Lines in a picture, this picture shows a very narrow alley way type road which looks never ending because of how Atget has used his camera. |
Eugene Atget's Photography  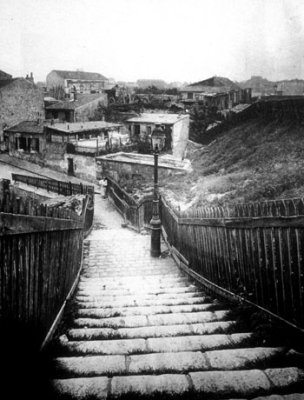 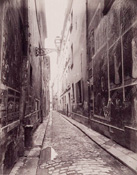 Working in the style of Eugene Atget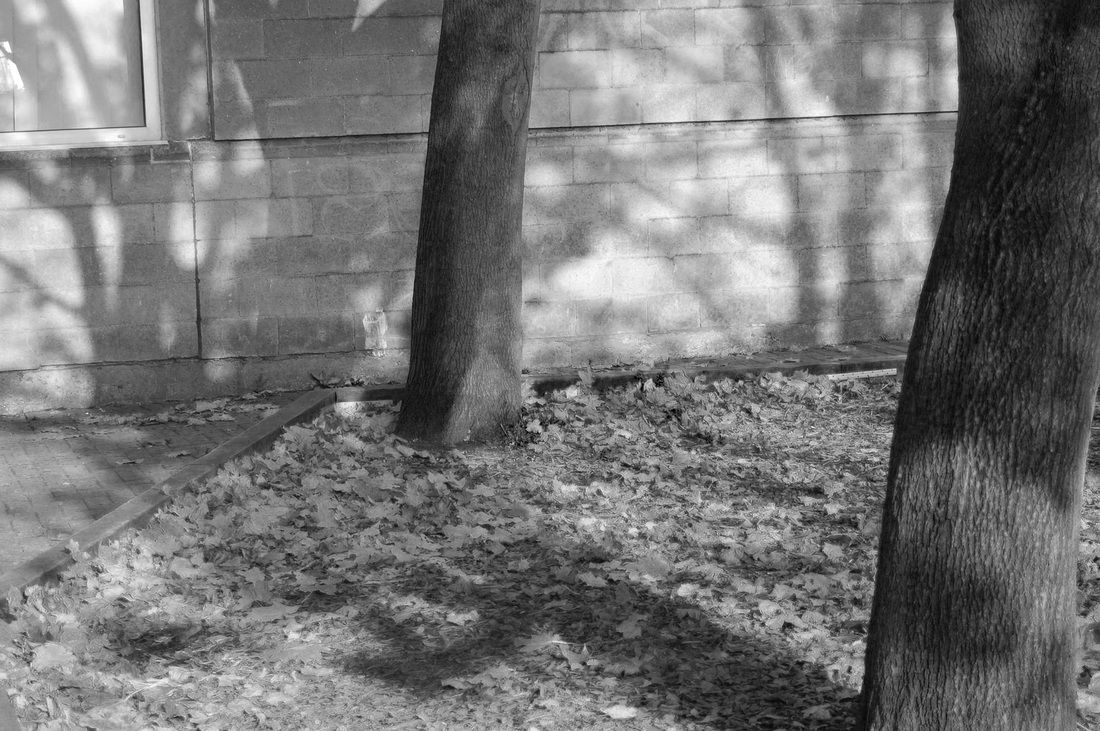 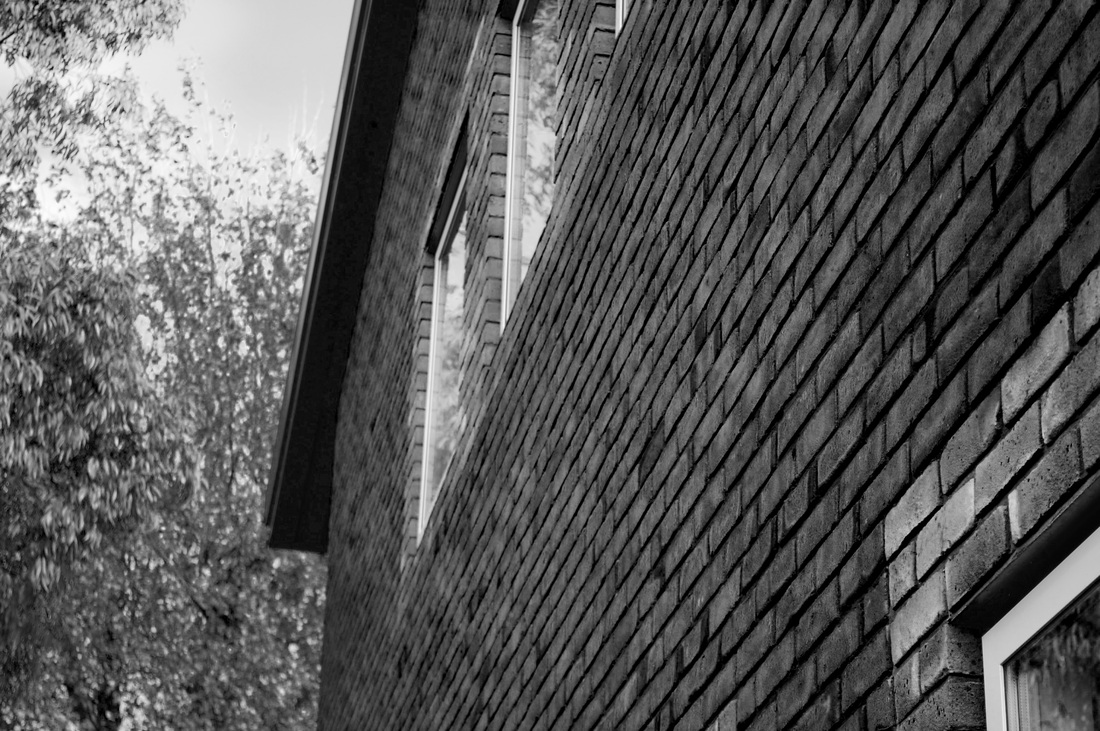   |
Stephen Hyde
|
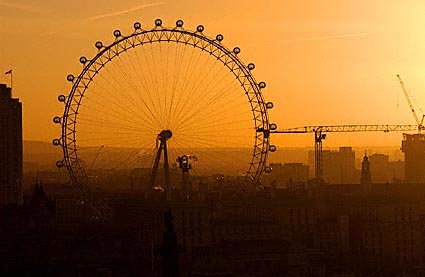
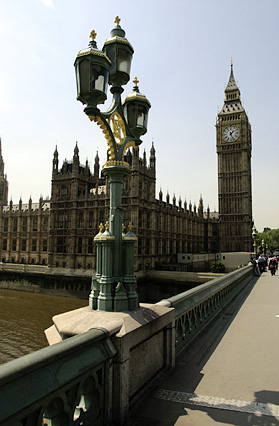
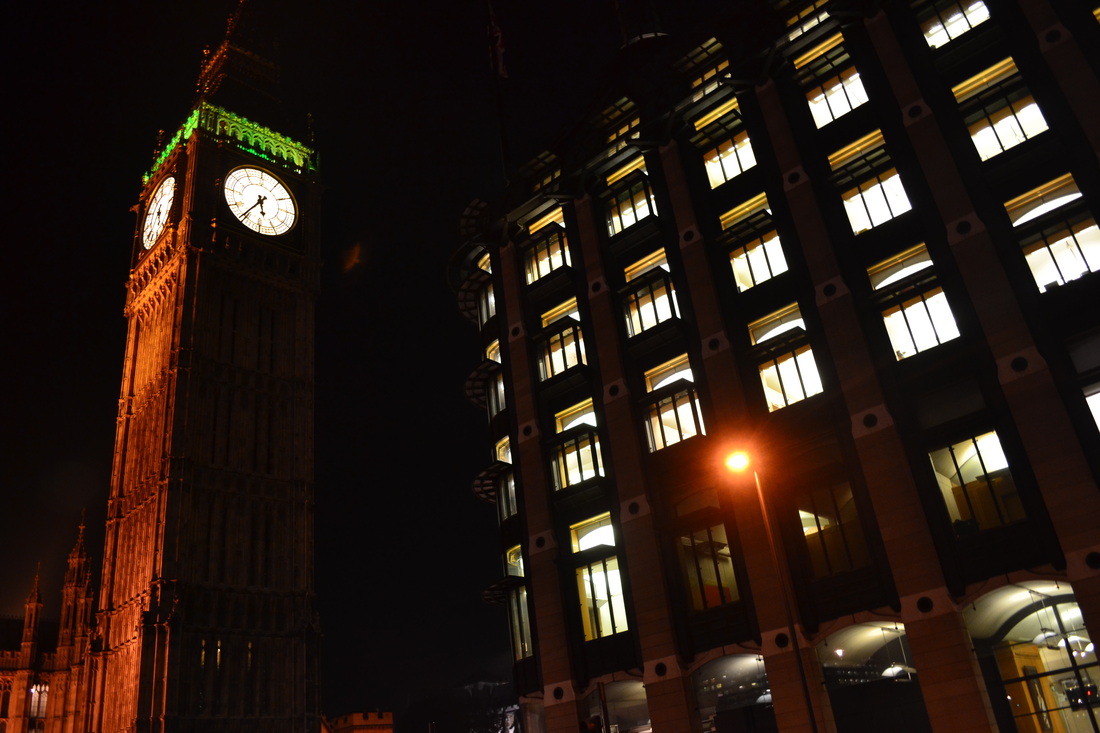
Stephen Hyde originally didn't aim to be a photographer as he earned a BA honours degree in modern history. Stephen Hyde then turned to photography as his great-grandfather was an influence because of his 'Victorian Photography'. Stephen Hyde then started to create a portfolio with his working by working with celebrities, The Sunday Times Magazine, The Telegraph Magazine, You Magazine and ES. He also had been entered in exhibitions such as the 'National Portrait Gallery' which had a collection of his photographs shown their. Stephan's photographs had been shown in the 'Royal Photographic Society'. This made his work more global as this is a international exhibition for photography. In these photos Stephen Hyde has shown some of the six rules of photography and camera techniques. In the picture of London Eye Stephen has made London Eye the main subject at with a large depth of field. This is a large depth of field because you're able to view everything Stephen intended. This is the same with the picture on the right hand side because you can see everything the photographer intended. In the picture of Big Ben, this is shown at a vantage point because anyone can view the subject at that angle, in reality. The picture of a taxi shows a camera a technique known as 'Panning'. This is shown with he background being blurred but using Photoshop Stephen Hyde has managed to do the same effect with parts of the subject.
|
    |
Comparison between Eugene Atget and Stephen Hyde
Both of these photographers are similar in the way they take their photos because of how they take the six rules of photography into perspective. For example, pictures are taken at vantage point; depth of field has been used and use of line. Another similarity is that both photographers take photographs at similar angles. Both of these photographers have their own style in presenting their work. For example, Atget presents his work to make them look more traditional and old by using the black and white effect and the sepia effect. Stephen Hyde presents his work by using more camera effects by adjusting the settings on his camera. Stephen Hyde also took his pictures depending on position of where he stands.
AO2
'Experiment with and select appropriate resources, media, materials, techniques and process,
reviewing and refining their ideas and work develops.'
reviewing and refining their ideas and work develops.'
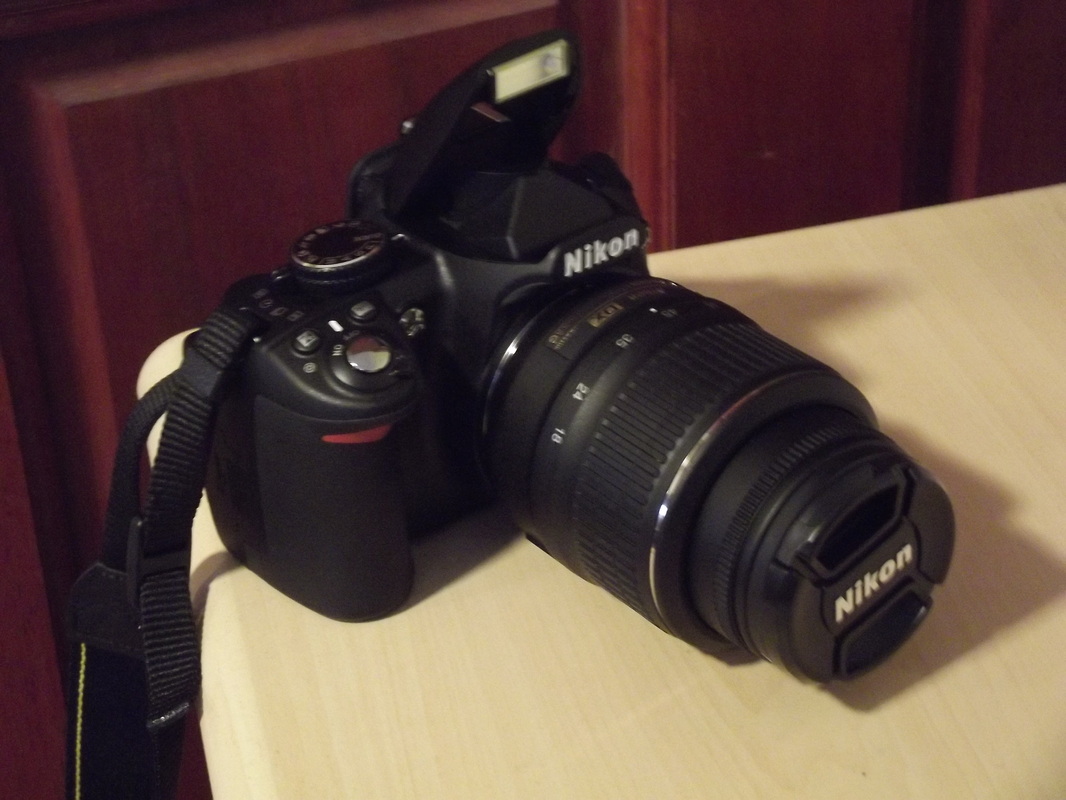
Camera FunctionsA DSLR contains will allow the user to do much more to make a photo come out better or the way you would want it to come out. A regular DSLR contains a view finder to see your object through; a diopter adjustment to show how big you want your picture; a shutter which you can also adjust to allow as much light is needed, in the photo; a lens which could be any zoom length, a standard one would be 18-55; it will have a aperture button so you are able to adjust how much light you want in your picture and a a small wheel like which lets you choose which setting best suits you, this includes a manual and automatic setting; a pentaprism so when the light hits the mirrors and bounces upwards, then hits another mirror and reflects the image back.
Some of these functions can also be found in compact camera. |
  |
Camera Techniques
Portrait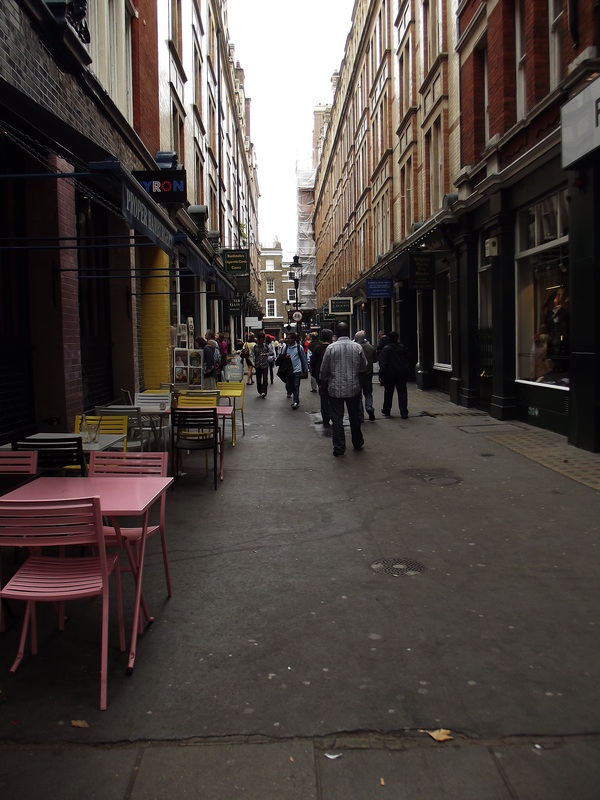 Portrait also gives us a narrow depth of field which allows us to focus on one main subject. Portrait is also the same as a high f-stop that lets in lots of light.
Landscape Using the landscape setting allows the user to capture everything that they want in a picture due to a slow shutter speed. Landscape is also the same as a low f-stop which allows in less light.
|
PanningTo pan
1) to choose a low shutter speed e.g. 1/30th of a second or chose a landscape setting on a compact. 2) When the subject approaches, follow them with your camera. 3) Press shutter down and continue following our subject.  Panning allows you to take a picture with the main subject in focus but the background blurred. The ways you do this is by following the subject, taking the picture half way through, and carry on following the subject.
BulbThe aperture setting controls the amount of light you let in.
f/1.4 - lets in a lot of light. f/16 - less light.  The bulb setting allows the user of the camera to let in as much natural light as possible until the picture comes out to your expectation.
|
Lighting
The AE-lock will measure the light of a person face to make sure it does come out to bright or too dark.
When the background tends to be bright the picture makes the subject silhouette. To stop this from happening you can use fill-in-flash or auto exposure lock setting which is located on a DSLR. The AE lock will measure the light of a person face to make sure the picture doesn't come out as a silhouette. When the light is in the background, you use the fill in light. The object and the background becomes brighter.
The way I have done this is by setting the subject in a location where they are on the same level as the light and taken the picture so they become a silhouette. The picture didn't come out to how I intended it to come out due to lack of light but you can clearly tell the differently when I used the AEL setting as the picture is brighter.
 No setting. Tungsten is a blue light that we cant see with our naked eye. Luminous light is a bright light that is reflected to give us a effect to our photo. I had to position the lights and also my subject so I am able to get the photo I intended to get. I have used 'Photo 1' as one of my photographs because the light is exposing my subjects face but also creating a shadow of the subjects nose.
In 'Photo 2', my intention was to set the light onto one side of my subjects face and create a shadow on the other side of my subjects face. |
 Using auto exposure lock. |
Six Rules of Photography Composition
1. Filling the frameIf you want to improve your photography, move 100% closer to your
subject. By doing this you ensure that your only taking a photo of only our object/subject and taking the attention away from anything else. In my first draft I had a idea of using the Osterly park house and enhancing the photo using Photoshop. For example, I wanted to show a theme within a theme. As my theme is the streets, I wanted to show a horror theme within that by making the in between of the pillars misty and faded with a dark clouds.
|
2. Framing the subjectFraming is a technique used to draw attention to the subject composition framing consists of using natural or man-made objects within the photo
itself. Creatively think of objects to use of frame. some examples include branches, windows, tunnels, doorways and archways. Anything that lets you look through one thing at another thing will make a good frame. You do this by keeping the focus and the lighting on the main subject.
|

3. Vantage PointWhat we see everyday, we see it from a vantage point. When your taking a photo of your vantage point, you can change it by standing on top of something or crouching or by taking the picture at a high or lower angle. The techniques of changing a vantage point are by taking the size scale, perspective, angles, worms eye view, birds-eye view into perspective.
Forced perspective is used when you want to make your subject look small. 
Photo 1
This is a vantage point because it is something Lampton School students come across everyday. We access this pathway so we can go to our next lesson, enter the field or get something to eat.
|
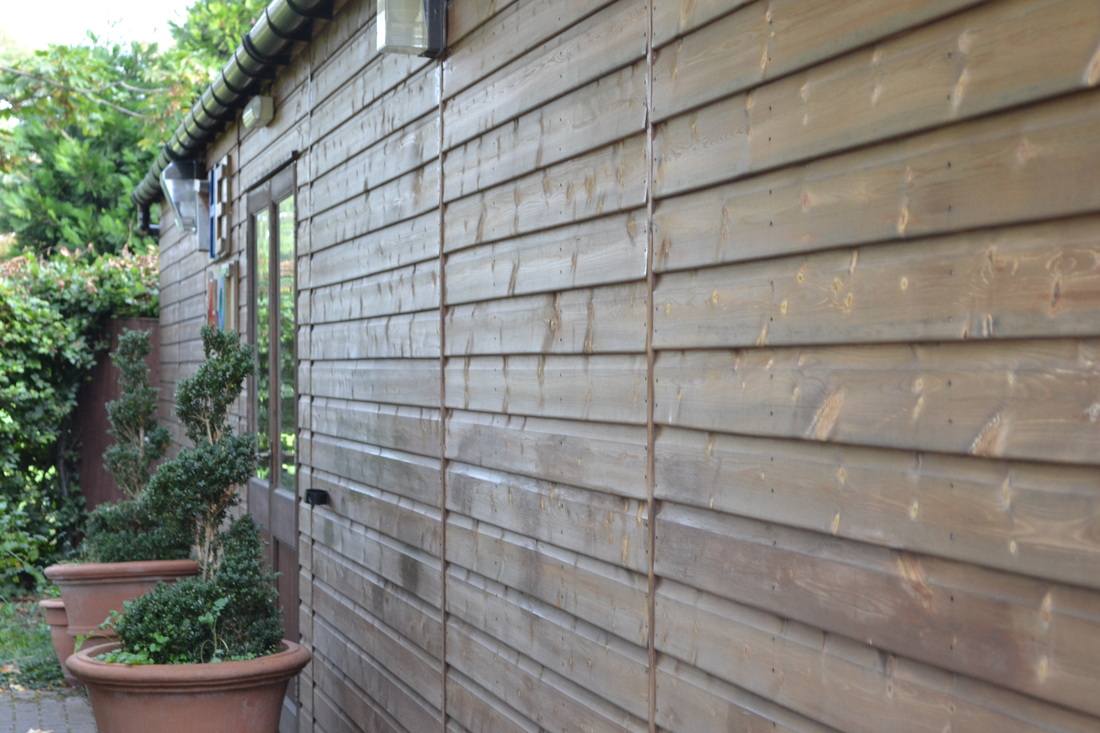
Photo 2
This is also another vantage point because you can line up and get this
view or if your about to enter this hut. |
4. Natural Depth Of FieldThe term 'Depth Of Field' describes the range in a photograph, from near to far, that appears to be in focus. Considering and employing depth of field will stop photographs looking 'flat'. When you are using this technique there will be a foreground, which is your subject, a middle ground, which is objects that are around it, and your background.
A shallow depth of field is when everything is not in focus, almost as if your isolating your subject from the background, also most as the background becomes a bokeh (blurred or fuzzy). A large depth of field is when everything is in focus, this is mainly used for landscape photos. |
|
Using Photoshop For Natural Depth Of FieldUsing Photoshop to 'Cheat':
-Blur Tool -Strength, 80-100% -Brush -Hardness, 0% 
Blur tool on photoshop.
This image shows the blur tool on Photoshop. This is used to make a background or another part of a photograph to be blurred, this can be used to 'cheat'.
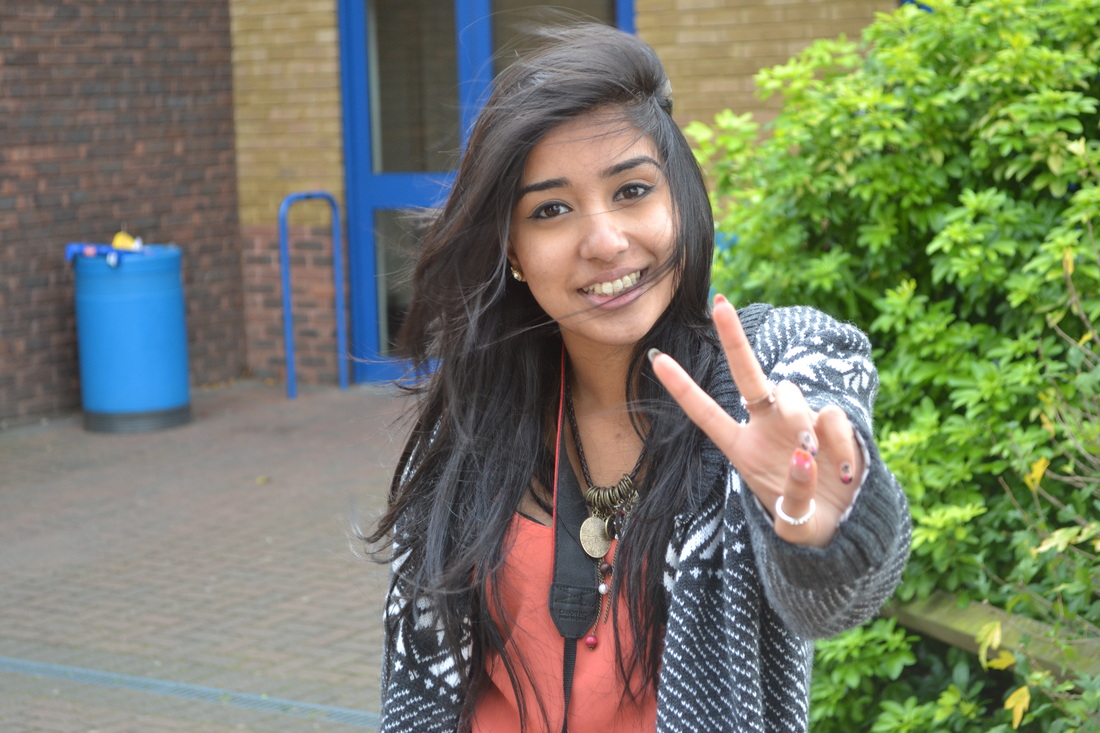
Photo 1: Before.
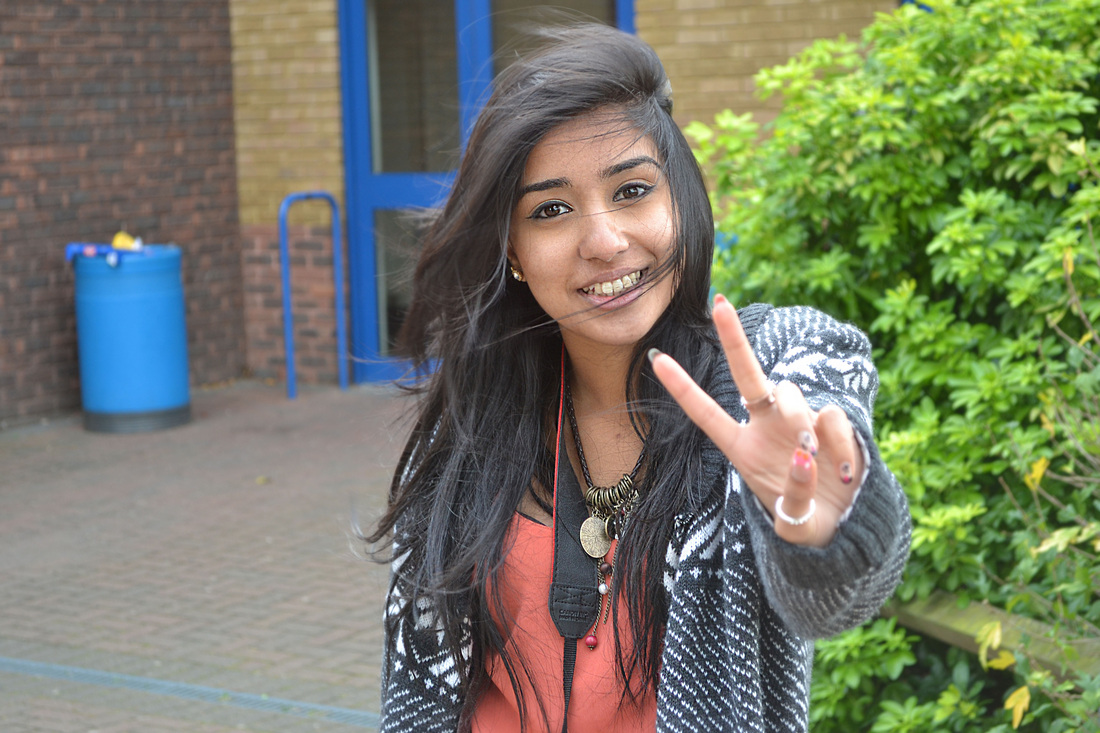
Photo 1: After.
In this 'Photo 1: Before' the background was partly blurred so all the attention was paid to my subject. What I did to 'Photo 1: After' is that I sharpened my subject's face so it stands out more and I blurred the hand out which makes the face more in focus.
|

Sharpen tool on photoshop.
This tool is used to make a subject clearer and make the subject stand out more.
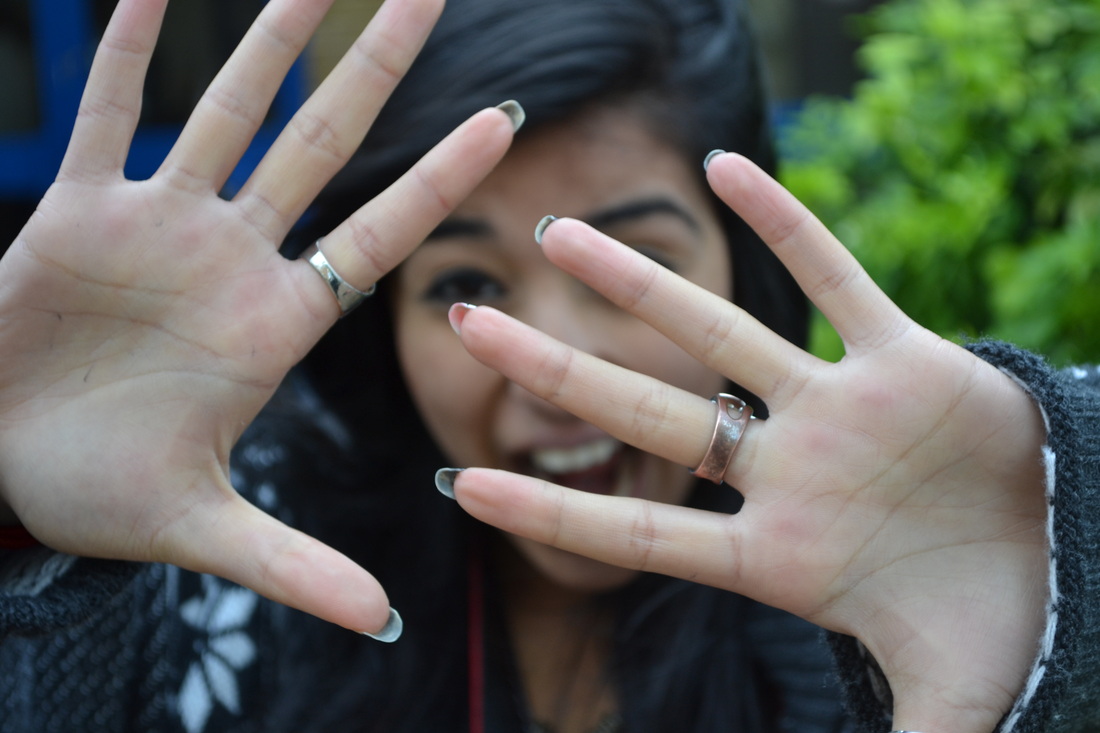
Photo 2: Before.
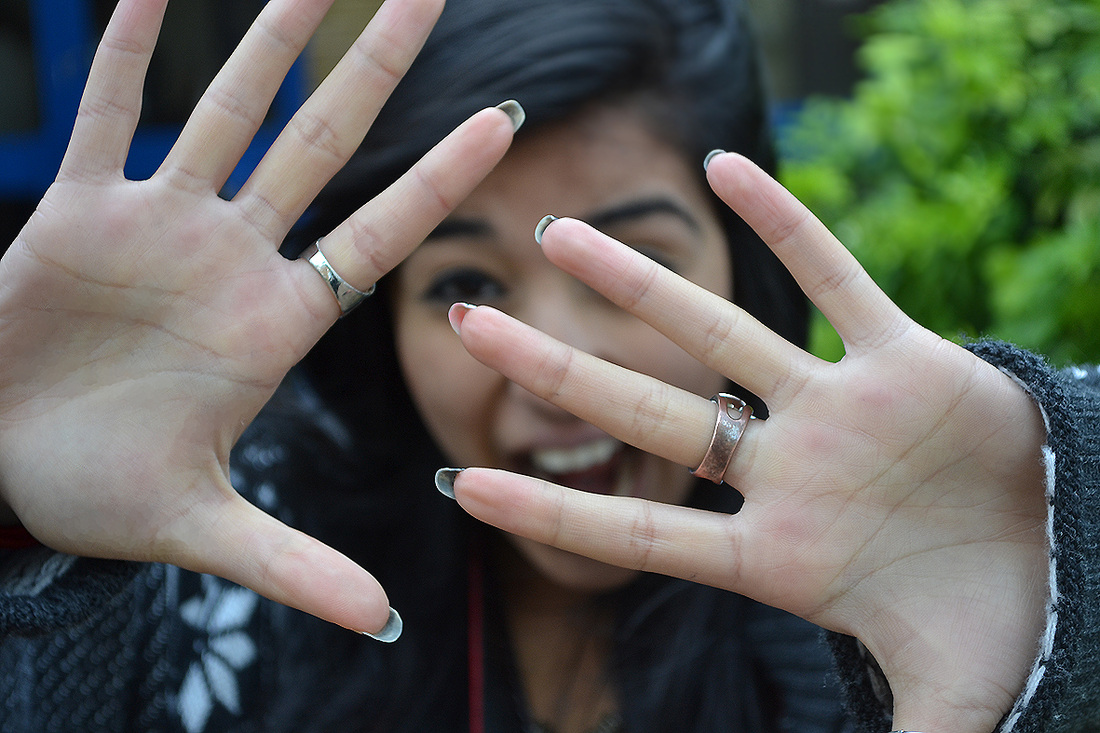
Photo 2: After.
In 'Photo 2: Before', it is a natural depth of field but using Photoshop I have
manipulated the photo. In 'Photo 2: After' I have made the background more of a bokeh to bring my subject's hands more in to focus, and I have also sharpened my subjects hands to enhance the focus of them. |
5. Use Of LinesUse of lines increase the impact of an image. They create a mood, they lead the eye through a photograph. This keeps the viewers eye kept on the main subject.
Vertical Lines: -Stability -Peace -Tranquillity Horizontal Lines: -Stillness -Frozen Diagonal Lines: -Dynamic -Movements -Action Lines in a photo an also be used to direct the viewers attention to a particular subject. You do this by making sure the line is always pointed to your subject. This will set the attention to your subject. 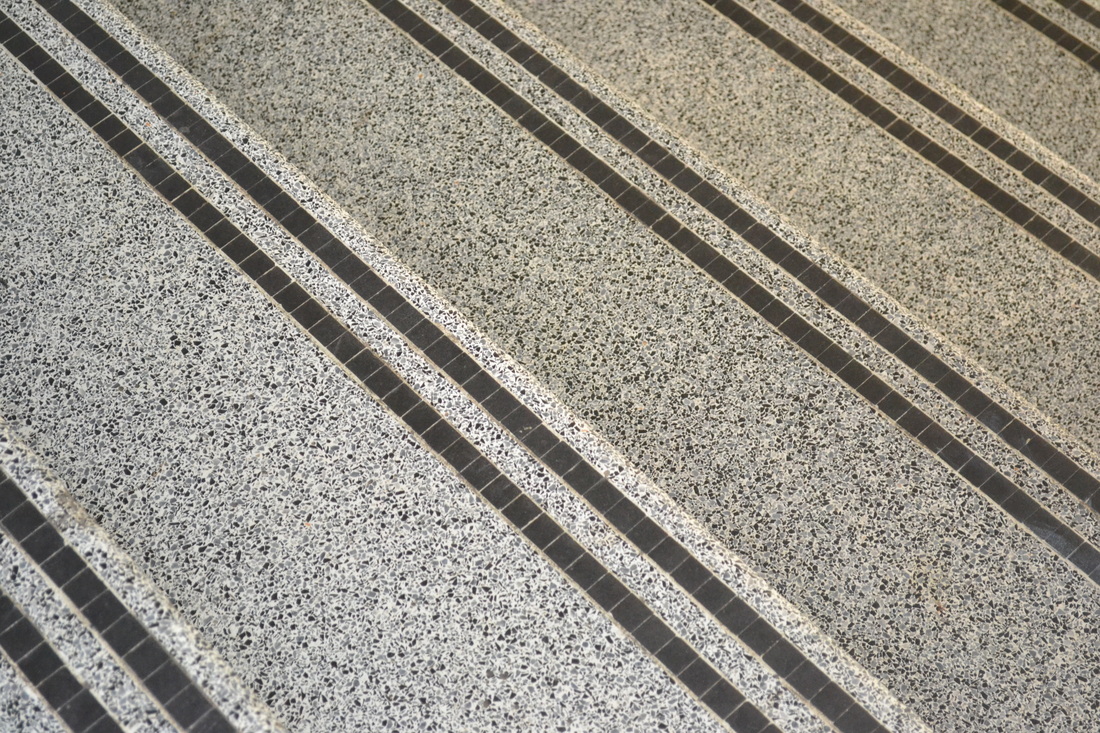
Diagonal Lines.
I have chosen this photography to be one of my diagonal lines because it shows a part of everyday life and what people use in their day. For instance this is a flight of stairs which shows movement because people can go up and down them to get to where they want.
|
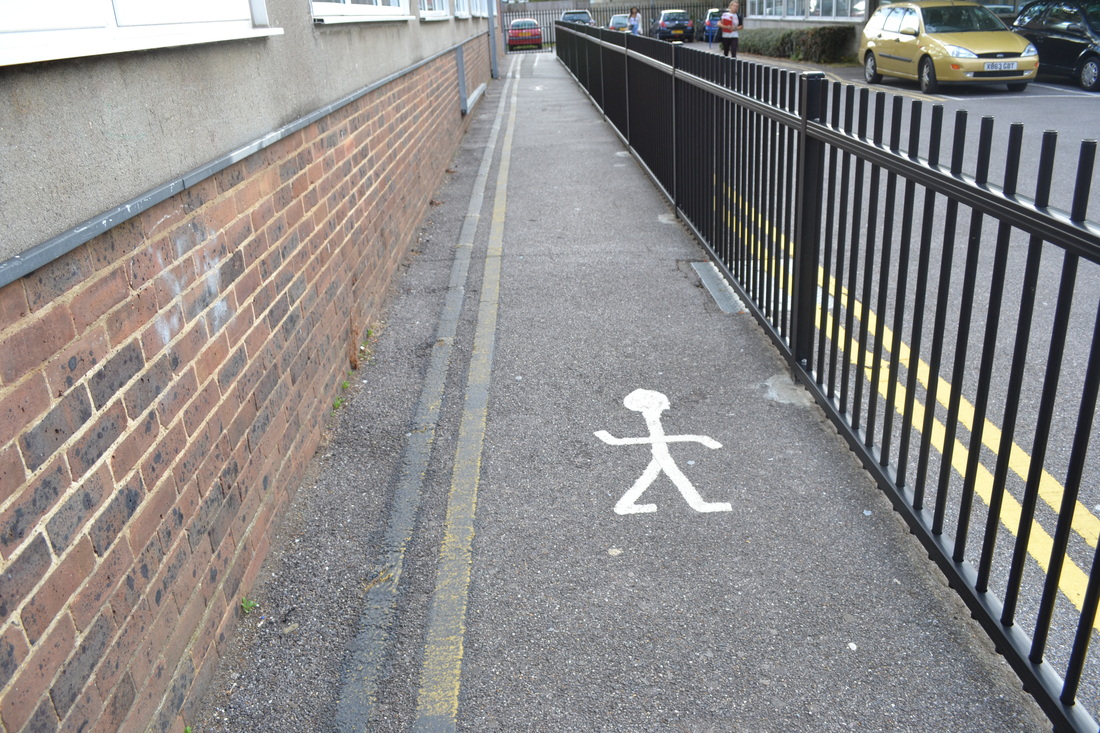
Vertical Lines.
This photograph may show a sign of peace. This is because it is a pathway and in peoples opinions, they may find walking peaceful which creates a mood for that individual.
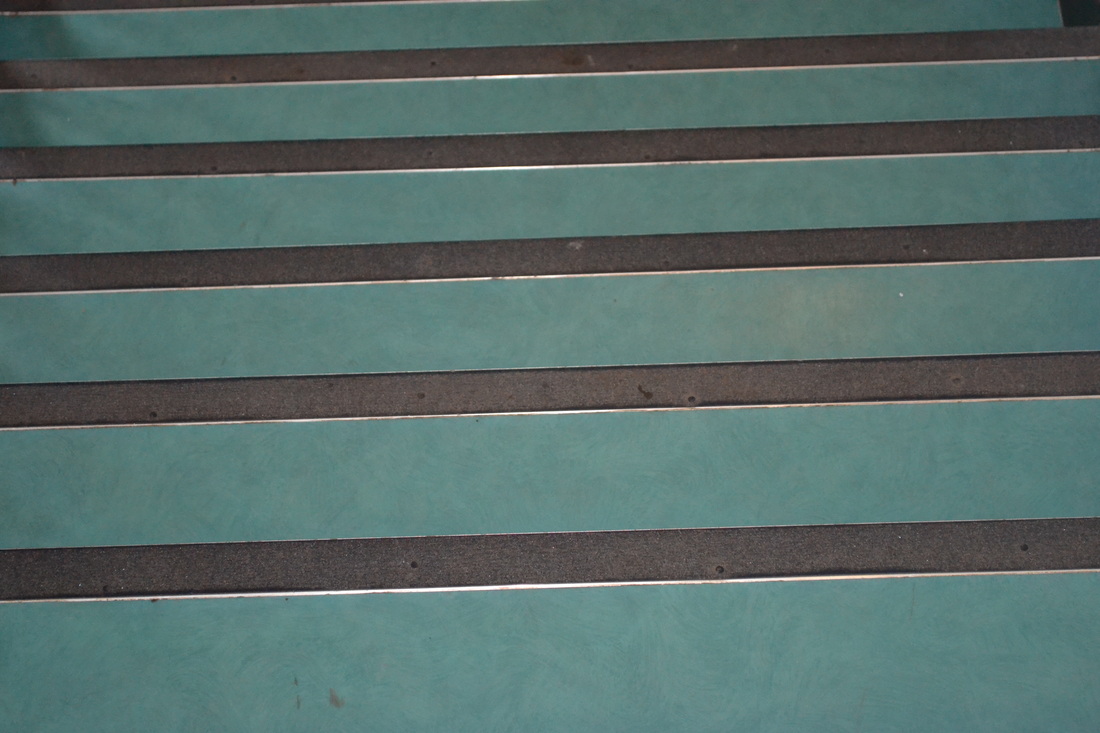
Horizontal Lines.
This photograph is also a flight of stairs, but a system has been made that your only allowed to go down these stairs. People would prefer this because from my own knowledge, people find it easier to walk down stairs than to walk up stairs, by walking up stairs, this can cause a sign of tiredness.
|
6. Rules Of ThirdsThe rules of thirds is a guideline that helps photographers frame and compose a picture so that the final outcome is well balanced ad draws attention to a subject.
A basic principle behind the rule of thirds is to imagine breaking an image into thirds so you have nine parts. 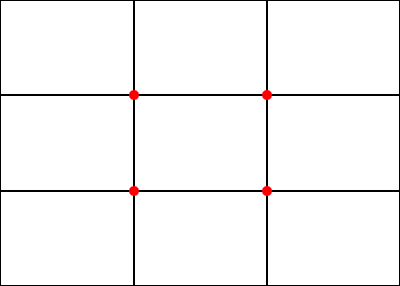
Rules of third grid.
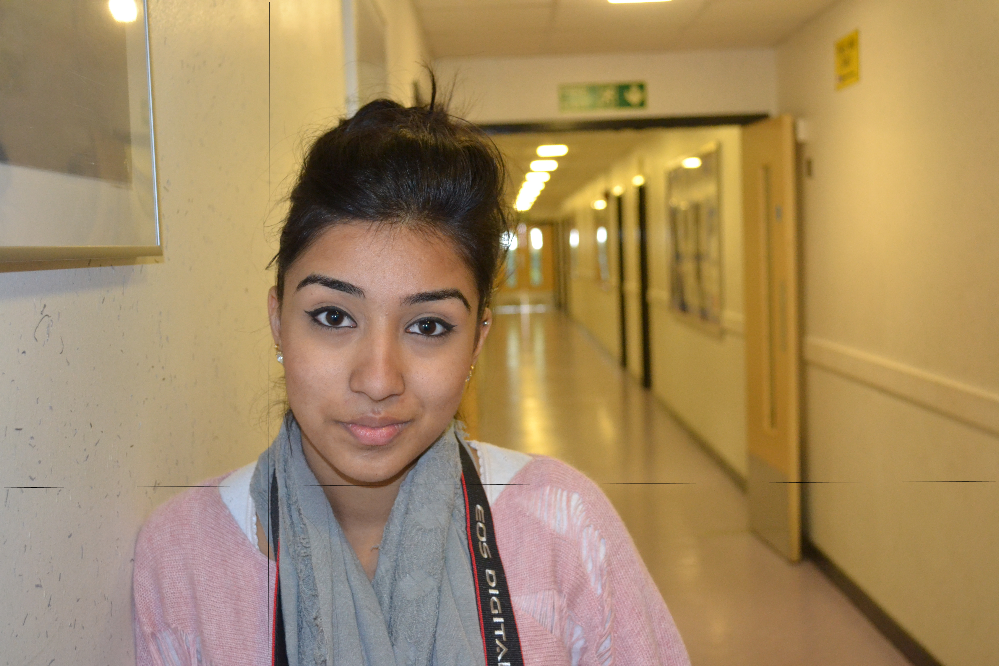
Photo 1
In this photograph my intention was to put complete focus on my subjects face so it stands out. Their is a vertical line going underneath my subjects chin and a horizontal line which is next to the ear, I have taken the picture like that to show that the shoulder is in level and to show my subjects face is upright.
|
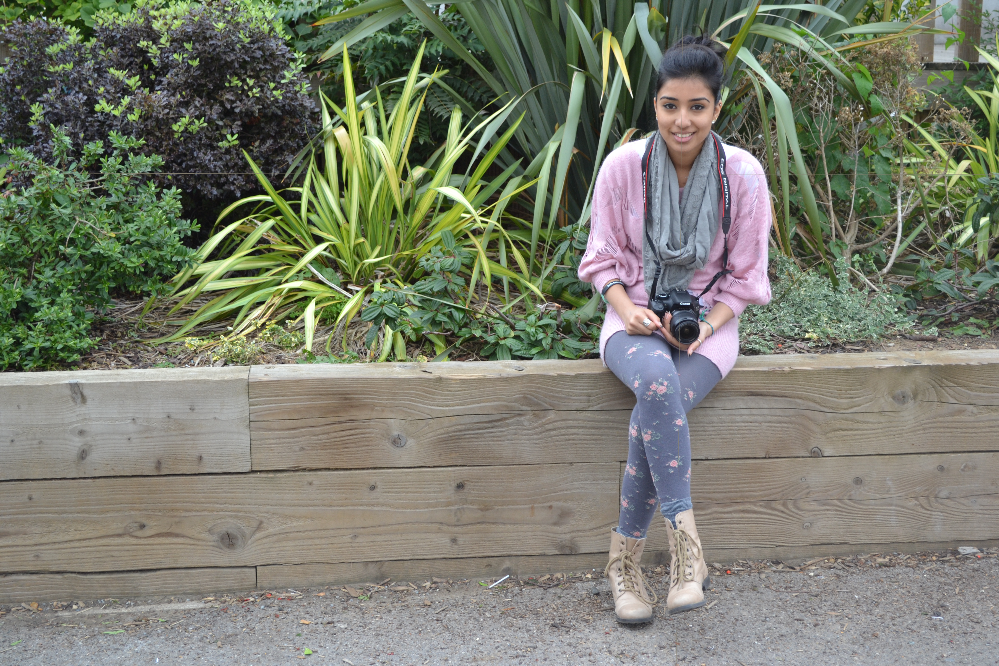
Photo 2
In this picture I have placed a vertical line on my subjects shoulder to show the photograph is in level and a horizontal line in the middle of my subject to show that the my subject should stand out from the environment.
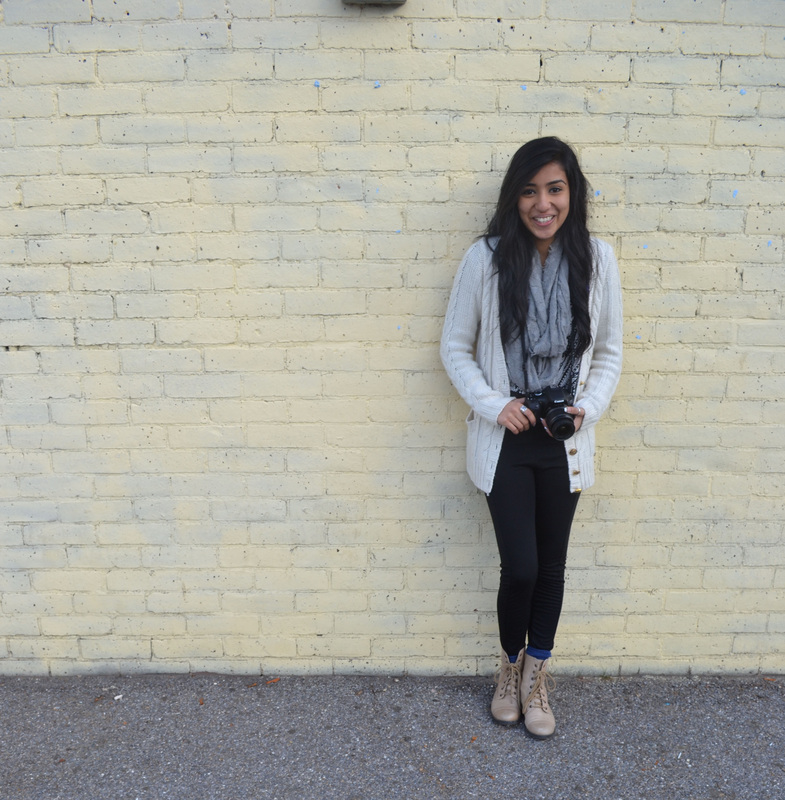
Photo 3
In this photograph, I have placed a vertical line on the knees of my subject and a horizontal line next to the right hand side of my subject. I have placed the rules of third lines in that certain position to show its a portrait picture and to show what should be standing out, which is my subject.
|
AO3
'Record in visual and/or other forms ideas, observations and insights relevant to their intentions demonstrating an
ability to reflect on their work and progress.'
ability to reflect on their work and progress.'
|
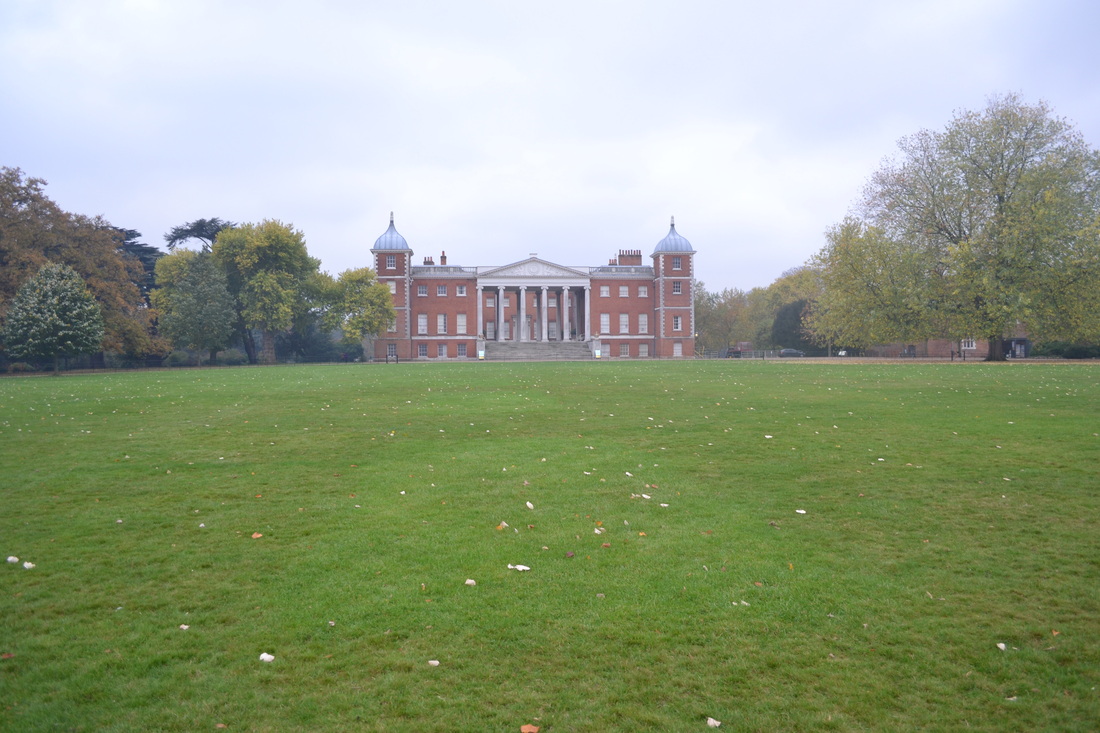
In this first photo shoot I went to Osterly Park and experimented taking photos of the Osterly Park House, and I had mostly experimented with the zoom on the camera by deciding which distance is the best for my final piece.
My second photo shoot was based in London and I had taken pictures of Big Ben and London Eye because these were my main focuses. Photo Shoot One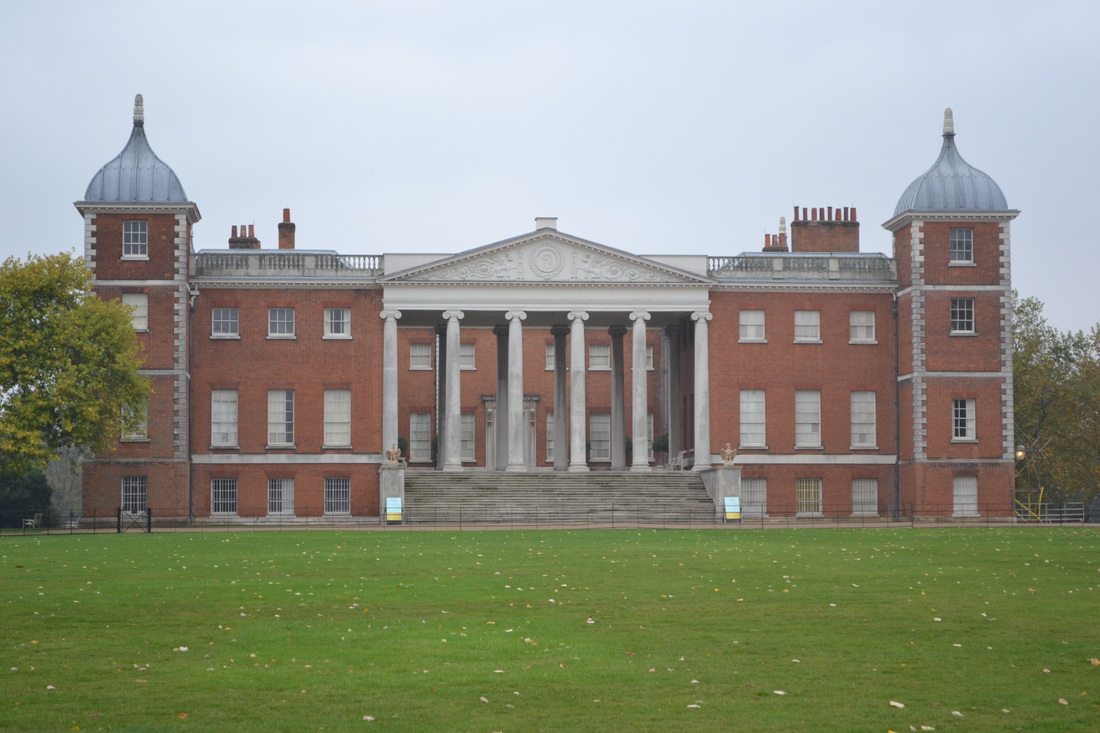
Photograph One.
In this photograph I had fully zoomed into the subject to put all the focus onto the House. This photograph was going to be used to show a comparison between day time and a surreal version of night time. I was going to put a theme within a theme. As my theme is 'the streets' I was going to put a horror theme within that to show a scary, misty and foggy side to night time.
Photograph Two.
In this photograph I had zoomed in half way to show parts of what is around my subject and so the photograph is not focused on one thing and a view would know their is more to the photograph.
Photography Three.
In this photograph I used no zoom at all to show full exposure of what is surrounding my subject. I didn't want to use this photography because it is exposing too much so less focus would've gone on to the photograph idea that I mentioned in photograph one.
|
Photo Shoot Two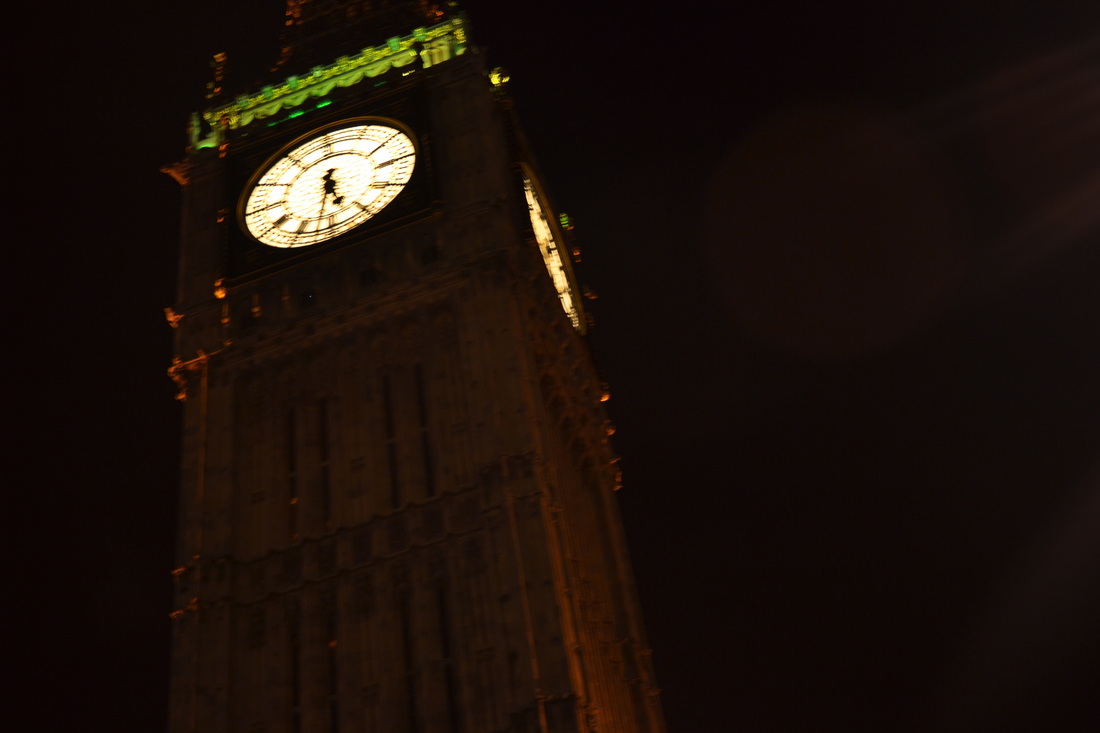
Photography One.
In this photograph, I was at a far distance from taking this but I had zoomed in. My idea with this was to merge this part of Big Ben and use London Eye in the background. I did not use this idea because the composition was not correct and because of the angle I was in.
Photograph Two.
In this photograph, I was standing at a crossing. This was the best position for me to stand in to take this photograph. I have chosen this photograph as one of my final photos because the camera setting I used emphasis's the clock of Big Ben and some colours off Big Ben.

Photograph Three.
This photograph was not used because too much had been blurred. For example, the main subject which was the funfair ride which had been blurred on purpose but what is around it, isn't supposed to be blurred.
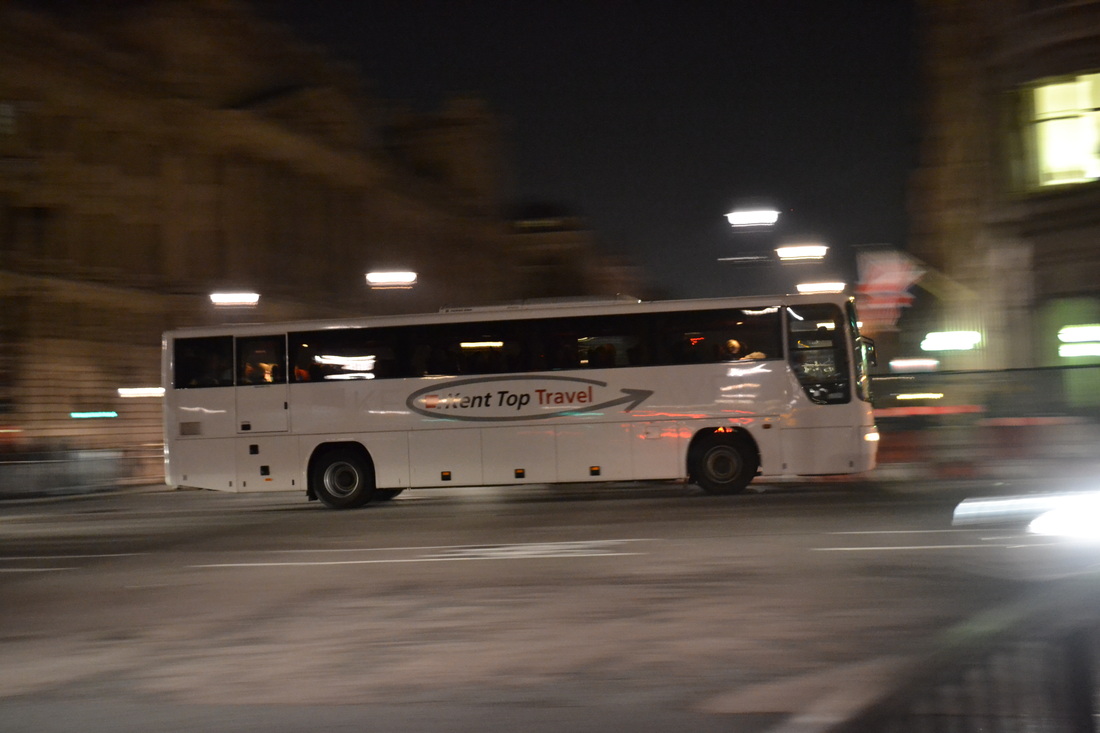
In this photograph I was standing in a good position so I was able to get all of my subject in the frame. After I set my positioning, I had waiting for the traffic to come by with the panning setting enabled and follow the coach, took the picture half way through and then followed through to get my final result.
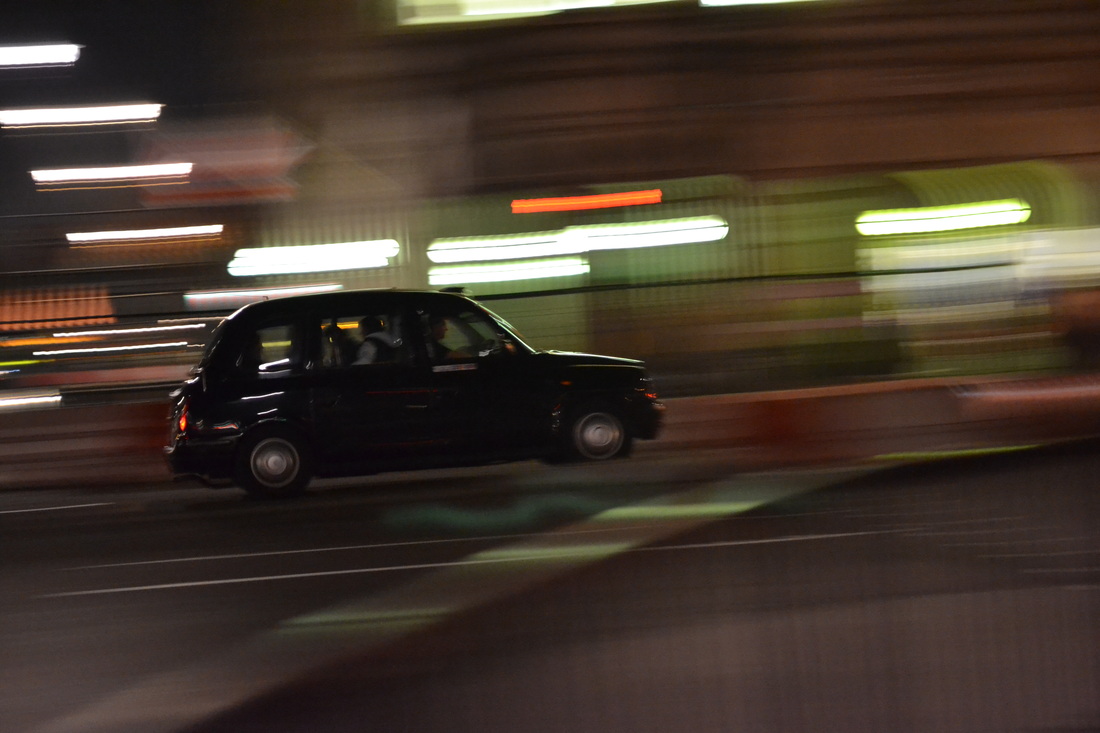
In this photograph I wanted to focus on a small car to show exaggerate how fast the taxi is really going using the "panning" setting. What I did to get my final result was set my position correct, follow the subject, take the picture half way through and carry on following the subject; but I followed the subject faster to bring more focus to the subject, and to get more of a blur in the background.
|
Using Photoshop
Pictures used for Final PiecePhotograph 1: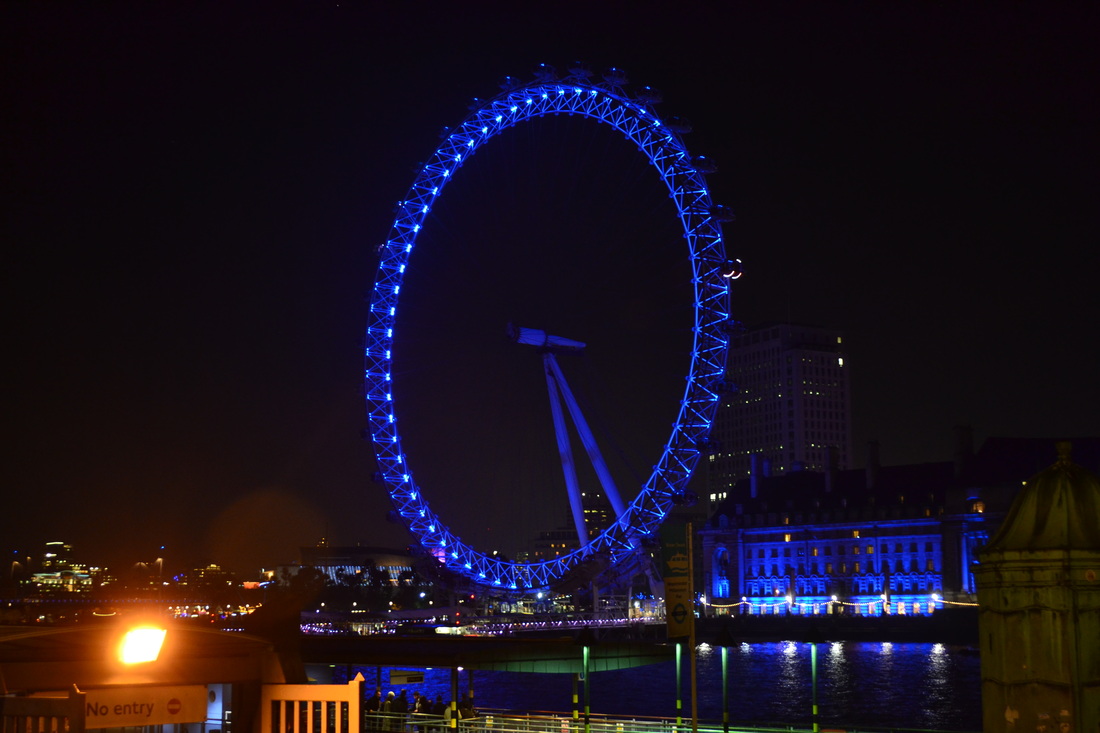
Photograph 2:
Photograph 3: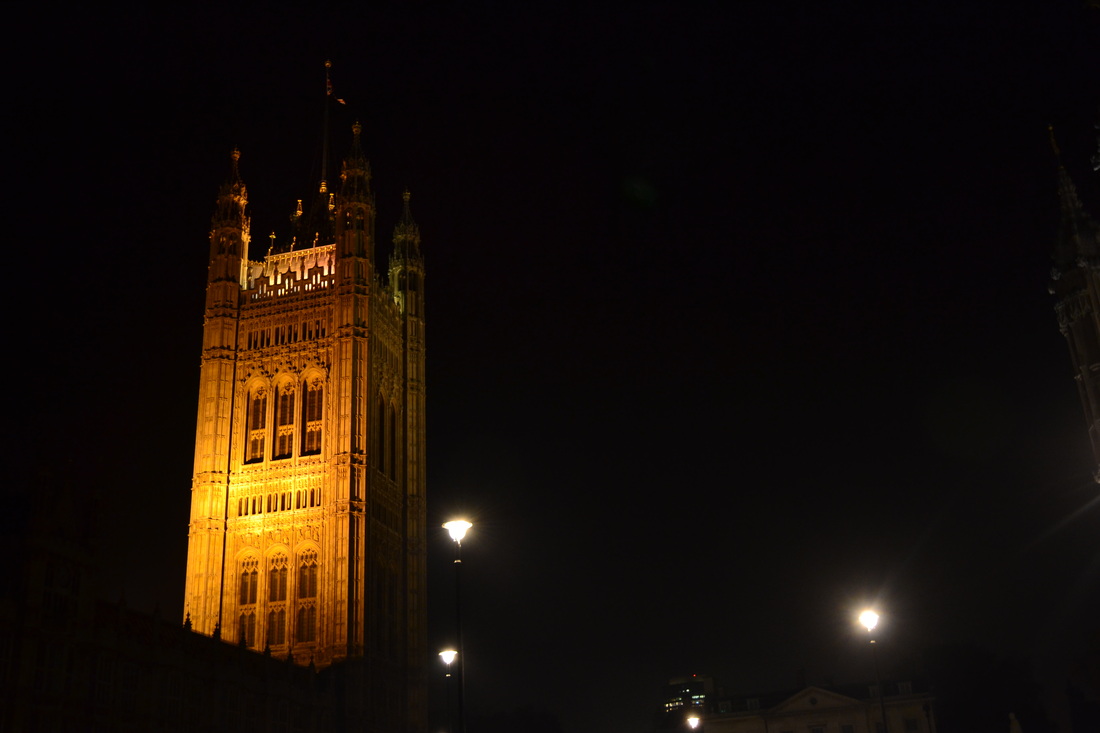
|
Build up to Final PieceScreen Shot 1: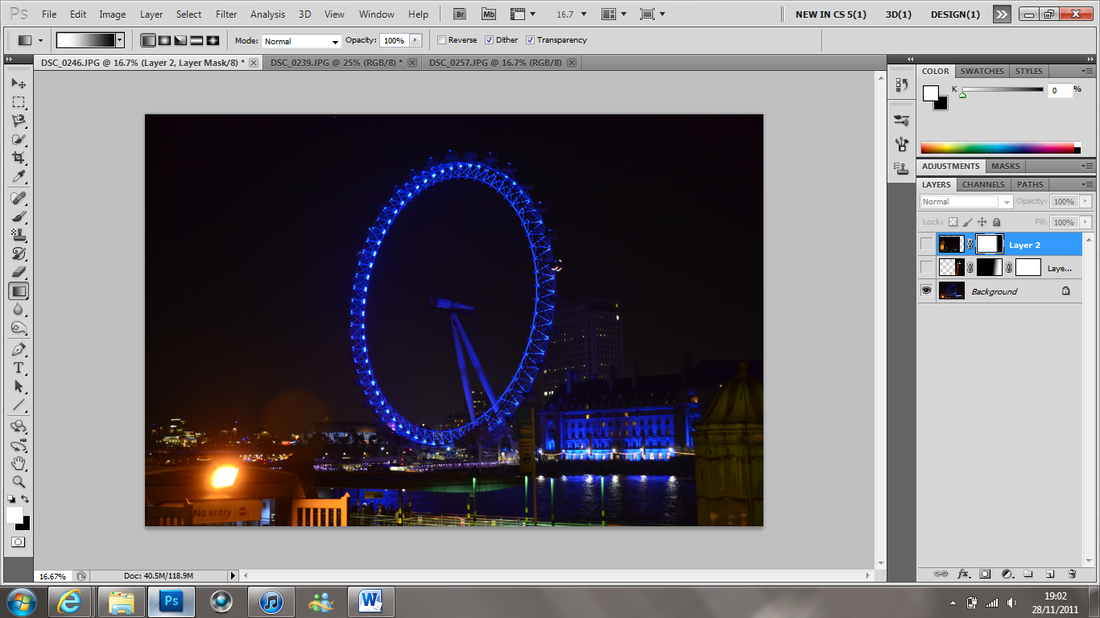
In this first screen shot I had opened the background picture that I'm using and because the picture was the right scale, I didn't have to adjust anything.
Screen Shot 2: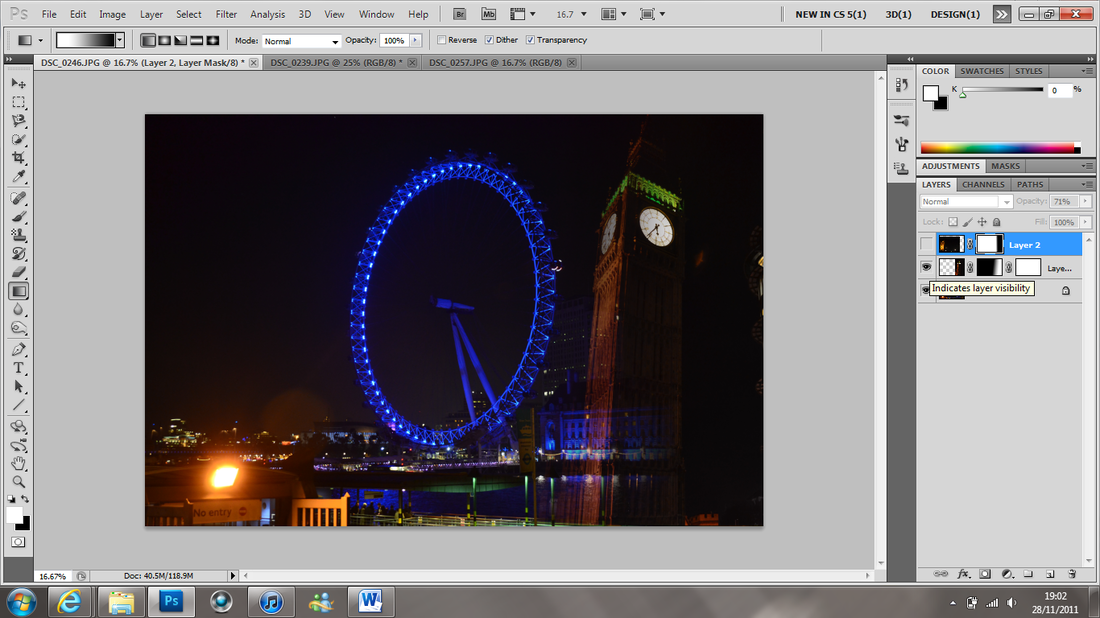
In this screen shot I had cropped just Big Ben out of the original photograph; drag and dropped the photo onto my background layer to where I thought it best fitted; added a mask layer and used the gradient tool to adjust where I wanted to fade the picture in.
Screen Shot 3: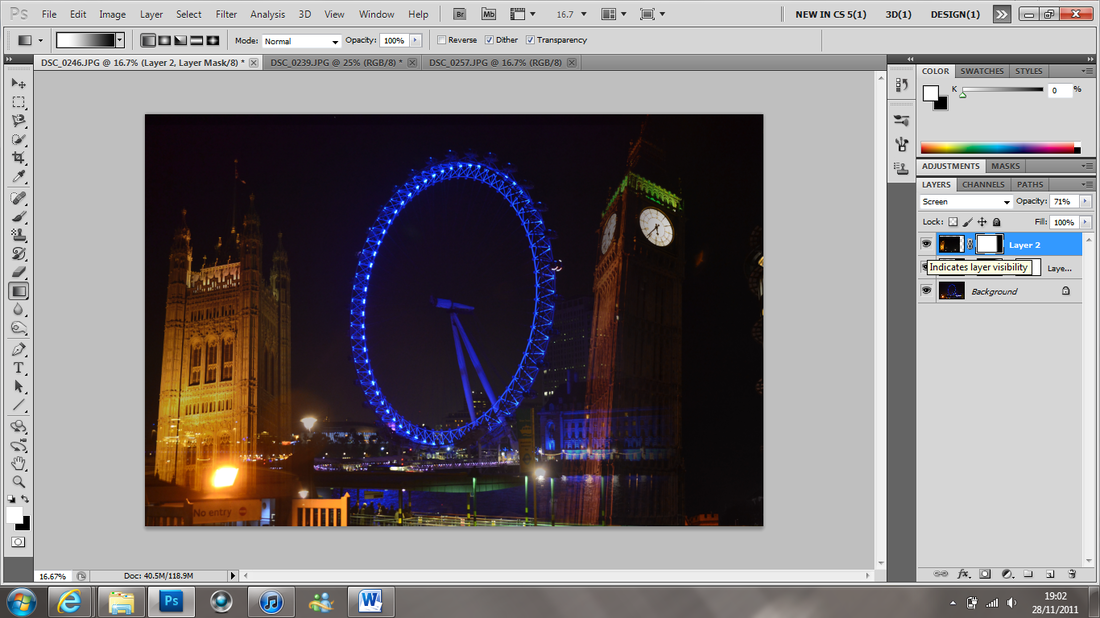
In this screen shot I had used the whole photograph and moved in onto the layer where I most focused on. I had used the same photo shop technique by adding a mask layer and then using the gradient tool to fade the photograph in.
|
Overall Evaluation
In this unit I planned my time well so I was able to complete my photo shoots in time and also edit my final piece, which meant learning new Photoshop skills, and being able to put the correct information on what I did throughout the process of this unit. What went well in this unit is that I was able to change my idea because my first idea didn't come out as I wanted it to and because I planned my time I was able to change my idea and do something different. I focused on taking particular pictures as I went to Central London, and the photographs I had taken came out how I expected them to which made the editing process a little easier. What I could have done to make my final piece better was to go to different locations with a cityscape and experiment with that which could have related to my final piece. Overall this unit went well for me as I did everything in the time given and was not rushed towards to end as I had planned my timing well in this unit.
AO4
'Present a personal informed and meaningful response demonstrating critical understanding, realizing intentions and where appropriate,
making connections between visual, written, oral or other elements.'
making connections between visual, written, oral or other elements.'
Attraction