AO1
'Develop ideas through sustained and focused investigations informed by contextual and other sources,
demonstrating analytical and critical understanding.'
demonstrating analytical and critical understanding.'
Brainstorm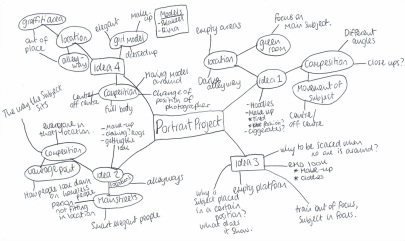
In this brainstorm I noted what I could be able to do in my portrait project. The idea I'm going with is to have a girl model and to be able to make her dress elegant. Then I'm going to place her in a location which does not suit how my model looks. My final pieces will show photographs of how my model is looking and within a location that does not suit how the model looks. This will be be very blatant in the photographs therefore you'll be able to tell the difference.
|
Drafts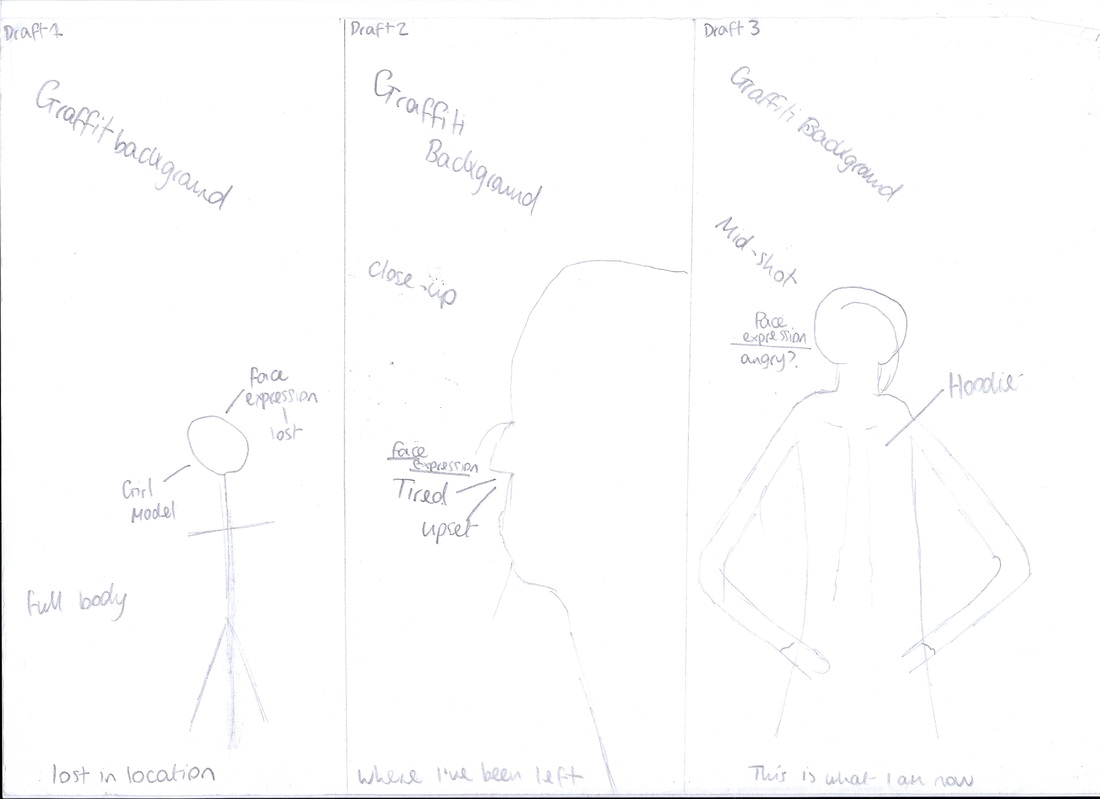
Draft 1In my first draft I want to show how my model is out of location by the way she is dressed and her facial expressions. My model can be shown out of location by use of setting, as I am going to place my model in a different location to what my model looks like. For example, having my model looking glamours and placing my model in a scrap yard. This will enable you to tell the difference.
Draft 2In this draft I want to make my models face a silhouette to show how my model has changed overtime without anyone seeing the actual changes, but still keeping the same background.
This idea did not work out as planned as this was an outdoor photo shoot so I was relying on natural light which was hard to pick out. Draft 3In this draft I'm showing that my model has adapted to the location by what she is wearing, make up and facial expressions.
This idea didn't come out as planned because as this unit went on I had slightly changed my idea. |
Artist Research
Martin Schoeller
Martin Schoeller is a New York based photographer who likes to use different models. They can vary to celebrities or unknown. His most recognizable work are his portraits, shot with similar lighting, backdrop, and tone. His work appears in The New Yorker, Outside Magazine, Entertainment Weekly, Rolling Stone, GQ, Esquire, and Vogue. Martin Schoeller photography are focused on close ups and to push intimacy to an unprecedented detail. When he is taking his photographs he tends to build a casual conversation with his model to relax them, to show their personality and their real self. Schoellers close ups summarize how people may look without tons of make-up on and showing the real them. The features he focus' on are the eyes, skin tone and lips to bring more emphasis to the picture. I dislike his work because it is too plain for my liking, I prefer photographs where more is happening and more of a story is being told.
Martin Schoeller's Photography |
Working in the style of Martin Schoeller |
Jorge Miguel
Jorge Miguel is a photographer has discovered his passion since he was fourteen and followed it through various themes. People quoted that Jorge Miguel's work was like "Dealing with light and colour as if he'd picked them from a painting palette". His photography is also very surrealistic. Jorge Miguel's photography suggests how people may be feeling due to the colour and props he uses. The features that really stand out about his work is the colour by matching the background colour with the the colour of the person, whether he's painted the model or not. I like his work because something is always happening and their is a meaning behind every photograph. Miguel might be trying to say that theirs more to photography than just getting your camera and snapping away. For example, using different colours and techniques. Jorge Miguel and Martin Schoeller's work are very different and similar at the same time. They are similar by how composition is used, face expressions, and lighting is used, they are very powerful in there pictures. But they are different by how colour and props are used. For example in Miguel's photographers he uses a cage which represents someone being trapped and colour is used to make the expressions on the model stand out.
Jorge Miguel's Photography |
Working in the style of Jorge Miguel
|
Own Photographer: Ken 'Street'
Ken Street provides commercial photography driven by imagination and a deep understanding of photographic and lighting technique. After getting into photography whilst travelling through India, Ken's photographic eye developed on a journey of discovery. Since then, Ken has continued experimenting with the limitless options the medium gives. His style has developed from his initial admiration of photojournalism and documentary photography to a more conceived, conceptual way of working. Ken now strives to produce highly creative work with commercial, technically precise production values. Here is a link showing his work and the style he works in, http://kenstreetphotography.co.uk/commercial-advertising-portrait-photography/. I have chosen Ken as my chosen photographer because of the images he captures and because they are majority street based. The types of images he captures is activities that are going on and not something you'd go and take a photograph of.
Ken 'Street' Photography
AO2
'Experiment with and select appropriate resources, media, materials, techniques and process, reviewing and
refining their ideas and work develops.'
refining their ideas and work develops.'
Lighting
Hard Lighting
Hard lighting is a substance of light that creates a contrast with shadows and highlights. These photos can be unflattering due to the contrast that has been used to get a final result. The smaller the light source is, the more contrast your going to get in your photograph.
|
Soft Lighting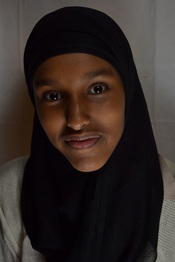
Soft lighting creates less contrast with shadows and highlights. This can make skin look softer, flatter and airbrushed. The larger the light source the softer the light will react to your subject.
|
Source 1 Lighting
Butterfly Lighting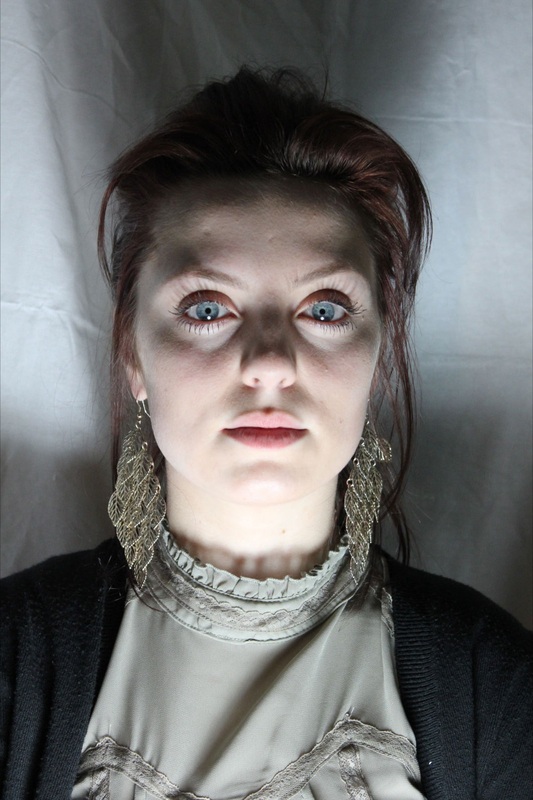
Butterfly lighting can be a flattering glamours lighting source, that sculptures the face and makes the subject look powerful. This is done by the camera being in front of the model at eye level and the light source in front of the model, raised 45 degrees towards the model. This can also be used with soft and hard lighting.
Rembrant Lighting
Rembrandt lighting can be a source of light which is a flattering, dramatic and beauty over mystery use of lighting. This is used for soft lighting and this is done by placing the camera at eye level in front of the model, placing the light source 35 degrees to the side of the model raised
|
Split Lighting & Rim Lighting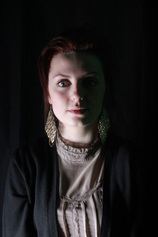
Split lighting can be known as extremely dramatic and a sinister style of lighting which has half the face shadowed. This can be done by placing the camera in front of the model, at eye level and the light source placed on the side of the model. This is a use of hard light. This light can also be used for 'Rim lighting' but to successfully carry out rim lighting you place the camera on the other side of the model.
Rim Lighting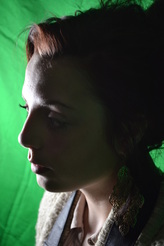
|
Source 2 Lighting
Clamshell Lighting
Clam-shell lighting is used to make the model look flattering and glamours. This is done by using two light sources. To get the result of this type of lighting is to use two large soft lights by positioning one light under the model but raised at 45 degrees and the other light above the model looking down at 45 degrees, with the camera in front of the model at eye level.
Spray Lighting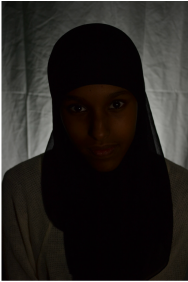
This type of lighting can make a dull wall look good. You're able to do this by placing the background light low which has to be behind the subject, and angled towards the wall. The closer the light is to the background, the smaller the circle of light becomes.
|
River Cop Lighting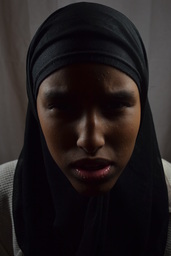
This type of lighting is used for suspicious scary or psychotic mood. This is use of unflattering style. You're able to do this by placing two equal bright lights, on either side which are slightly behind the model with the camera in front of the model, at eye level.
|
AO3
'Record in visual and/or other forms ideas, observations and insights relevant to their intentions demonstrating an ability
to reflect on their work and progress.'
to reflect on their work and progress.'
Photo Shoot One: Experiment
|
|
These photographs did not work well. This is either because of the use of lighting, composition and the correct facial expressions.
In photographs 1-6, I had concentrated more on the background to see what works well with that the model is wearing. As the model is wearing a cream top, I tried matching that with a similar coloured background to show that the model is part of that environment. And in photographs 7-9, I focused on the composition of the model to see where the model can stand and what way they'll be facing whilst I take the photograph. |
Photo Shoot One
  In these photographs I used the brightness and contrast tool to set it to a particular expositor and the brush tool make any spots or blemishes less noticeable.
|
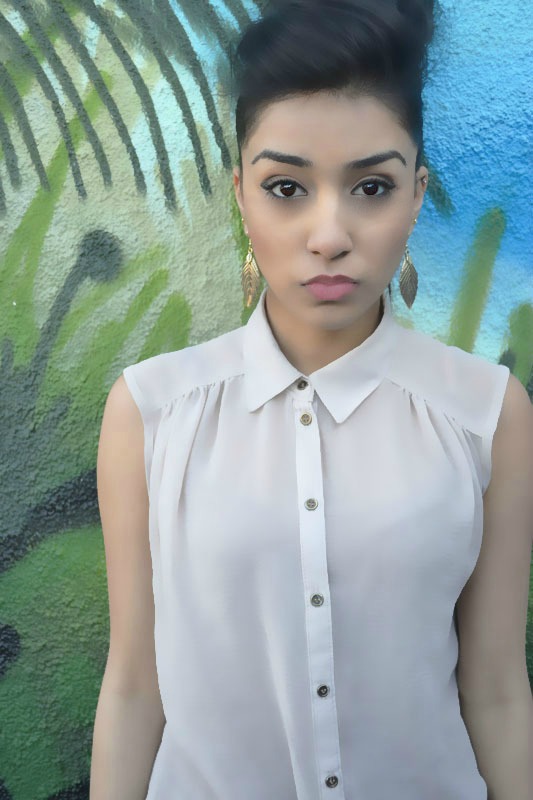
These three photographs went well as I was doing my first photo shoot. These photographs went well because of the position of natural light. For example in photograph two split lighting has been shown which can interpret two sides to a person. My main idea for this photo shoot is to place my model in a different location to what they look like they'll be in.
Photograph 1 This photograph shows the whole figure of my model including the background. Because my theme is 'the streets' I wanted to use a background that wasn't looking it's best but also something which blended in when my models use of clothing. By using similar colours of clothing with the background can show that the location used is the persons true area. Photograph 2 In this photograph my main focus was the facial expressions. The facial expressions show anger and emotion towards the location that the model has been placed in. The anger and emotion is saying that the model doesn't want to be in this location and wants to set free from that location. Photograph 3 My main focus for this photograph was composition and a particular pose. I wanted my model to look almost lost in her location by looking out in the open to make my model look like she's searching for her identity. The pictures that are not labelled, worked well because of the composition and use of light. I have also used Photoshop to make slight adjustments. For example adjusting the brightness or contrast or using surface blur to make my models skin tone look smoother. I am also going to use a few photographs from this photo shoot, as my final piece. |
Key Image (Idea): The key idea of this photo shoot was to place a glamours looking model in a location that doesn't suit how the model is dressed.
Setting/Location: Estate/Flats Props: The only props used was the jacket that my model had been wearing but this wasn't successful as the photographs did not have the right look when my model had placed the jacket on. Make-up/Costume: The make-up and costume was very important in all my photo shoots. In this photo shoot I used make up to give my model a glamours look and the costume used was to make my model look like she was attending a party, hence why my model looks more dressed up than casual. Lighting: The lighting used was natural light as it was an outdoor photo shoot. I chose to do a outdoors photo shoot as it was difficult to prepare an indoors photo shoot in a green room. Editing: The only editing that occurred in this photo shoot was mostly brightness, contrast, spot healing and airbrushing. |
Photo Shoot Two: Experiment
|
|
This photo shoot didn't work well because I was going off track of my idea. For example, this photo shoot is more location based rather than focusing on what my main idea is which is a dressed up, glamours female in a location which doesn't suit her for instance a scrap yard.
  In these photographs I used the brightness and contrast tool to set it to a
particular expositor and the brush tool make any spots or blemishes less noticeable. |
Key Image (Idea): The key idea of this photo shoot was to place a glamours couple and put them in a location which did not suit how they were looking. This didn't turn out how I expected as I didn't use composition very well and one of my models in this photo shoot didn't look how I intended them to look.
Setting/Location: Forest Props: There were no props used in this photo shoot. Make-up/Costume: The make-up was kept very simple. On my female model the make-up could have been more exposed in the photographs as this is where I could have gone wrong. The male model came to the photo shoot too under dressed where I should have directed my male model properly to wear the appropriate clothing for this photo shoot. Lighting: The lighting used was natural light as this was another outdoor photo shoot. Editing: The only editing I did on this photo shoot was fixing the brightness and contrast, removing any blemishes off my models and airbrushing my models faces. |
Photo Shoot Three
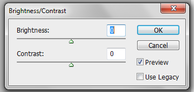  In these photographs I used the brightness and contrast tool to set it to a
particular expositor and the brush tool make any spots or blemishes less noticeable. |
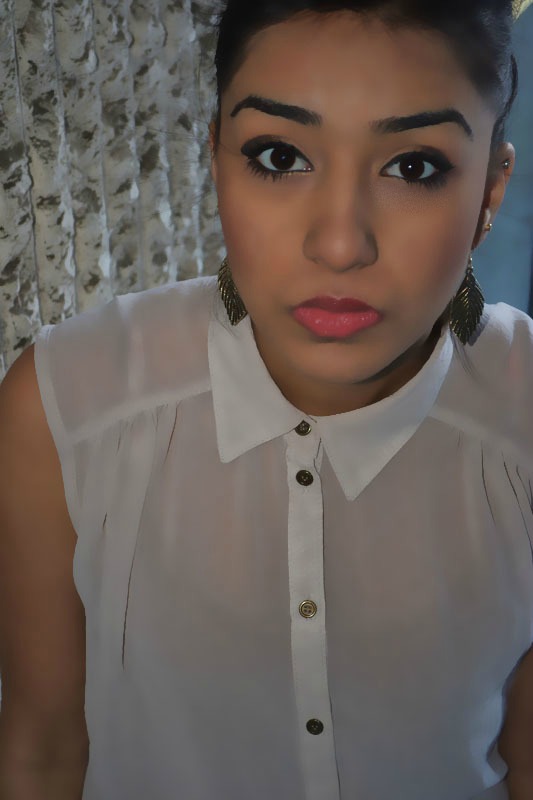
In this photo shoot my aim was to focus on lighting and facial expressions. My idea on this photo shoot worked against itself by making my model look not so glamours but to use glamours lighting techniques.
Photograph 1 This photograph shows my model not looking glamours due to the clothing and facial expression but the source of light I used (Rembrandt lighting) gave an affect on the photograph to make my model and the actual photo itself, look glamours. Photograph 2 This photograph is based on composition as well as lighting expressions. By taking the photograph at a high angle shows the model is in a inferior and everyone is at more of a superior level compared to my model. The facial expressions are expressionless because I want to be able to show a bad side to not having what you want all the time. In this photograph I used split lighting which isn't used for glamours use, but I used it to show two sides to a person, a dark side and a good side. Photograph 3 This photograph is focused on facial expressions because I wanted to make my model look lost in her location and she's searching where she belongs. For example the lost expression doesn't go with the glamours lighting which means she's searching for the 'glam' within herself. Photograph 4 This photograph shows insecurities within in the model due to her looking own and not looking confident at all. But the glamours lighting helps bring out the good in her insecurities to make herself look and feel better. Photograph 5 This picture is to show the innocence in the model, by the models facial expressions but using a lighting that doesn't match the facial expressions. this also shows me working against my idea as experimentation. The photographs that are not labelled didn't work out well because they were either too dark, the composition wasn't right or the facial expressions were off. |
Key Image (Idea): The key idea of this photo shoot was to do the complete opposite of what I intended in my first two photo shoots. The idea was for my model to look not so good but my aim was to used glamours lighting.
Setting/Location: Green Room Props: The only prop used in this photo shoot was the jacket to make my photo shoot fit into place. Make-up/Costume: The make-up was kept very simple in this photo shoot was I didn't want to give off the glamours look. The costume was also kept very simple as I didn't want any feature to be too exposed, just to be kept very simple. Lighting: The lighting I mostly used in this photo shoot was Rembrandt lighting to give off that glamours effect. I also used split lighting to show that my model has two personalities which is a glamours side and a simple side. Editing: In this photo shoot, the editing techniques used were brightness and contrast, spot healing and airbrushing. |
Photo Shoot Four
|
|
In this photo shoot, these pictures didn't come out as good mostly because of the low level of lighting which didn't bring emphasis on anything and because of the low level lighting, nothing really stood out; but their was a photograph with too much lighting. Another reason why these pictures weren't to my standards because the lack in composition and facial expression as the model had blinked in one of the photographs.
  In these photographs I used the brightness and contrast tool to set it to a
particular expositor and the brush tool make any spots or blemishes less noticeable. |
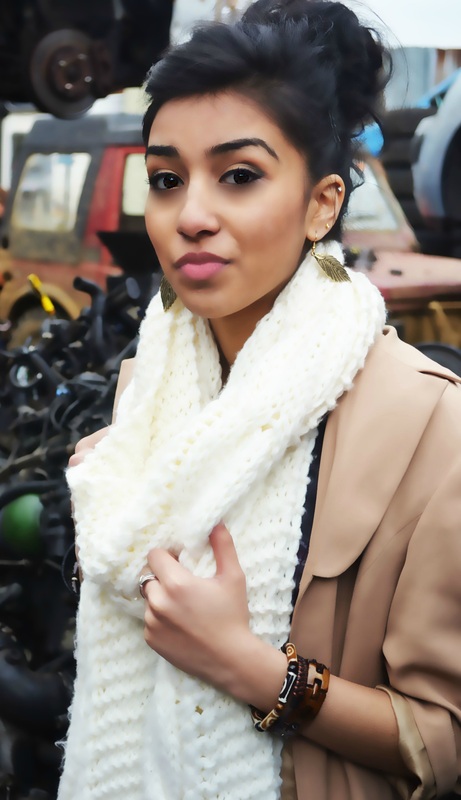
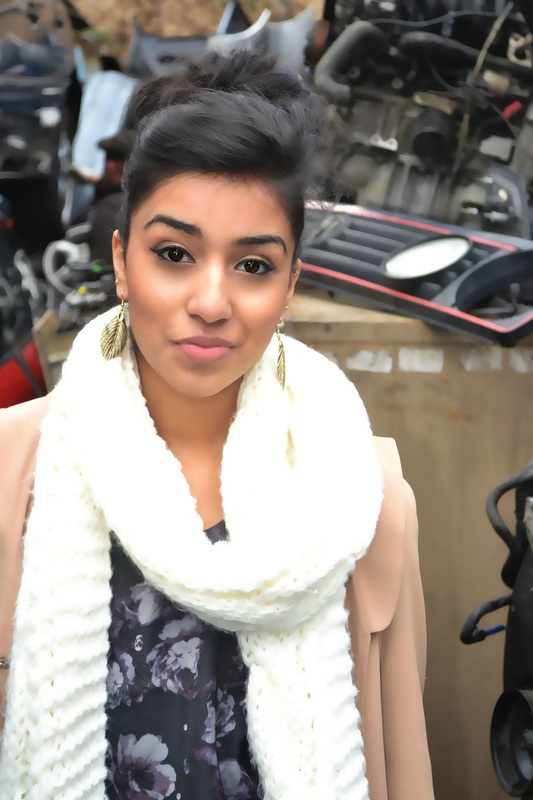
Key Image (Idea): The key idea for this photo shoot was to place my model in a scrap yard with my model looking glamours to show the correlation between the location and the model.
Setting: Scrap yard Props: There were no major props used in this photo shoot. Make-up/Costume: The make up and costume were very important in this photo shoot as my model has to look appropriate. The costume used was very appropriate as my model gave away a glamours look which was intended which was used well as I was taking the photographs. Lighting: The lighting used in this photo shoot was natural light as it was an outdoors photo shoot. Editing: The editing used in this photo shoot was kept simple as I adjusted the brightness, contrast, removed any blemishes and airbrushed my model. |
Overall Evaluation
In my opinion, this unit was the hardest for me as I had come up with an idea but I found it difficult to build up on my idea. But I had stuck with this idea and done as much as I could with it. For example I had used more than one model, I had chosen four different locations and built up my final piece from two of those four locations. What could have gone better was my planning of time. I done my first two photo shoots in plenty of time and left my last two photo shoots near the end of the deadline which could have effected how my photographs would have been towards the end. Overall, I managed what I was doing in the time given well so I didn't have to rush my final pieces which was a huge benefit for me.
AO4
'Present a personal informed and meaningful response demonstrating critical understanding, realizing intentions and where appropriate, making connections between visual, written, oral or other elements.
This is my slide show showing the 4 photographs I have selected as my final piece that shows a glamours model that does not fit within a location. By doing this you're able to tell the difference between my model and location and know what my photographs are about.
Differences